Displays a breakdown of sales and order count for each vendor.
To view sales by vendors, follow these steps:
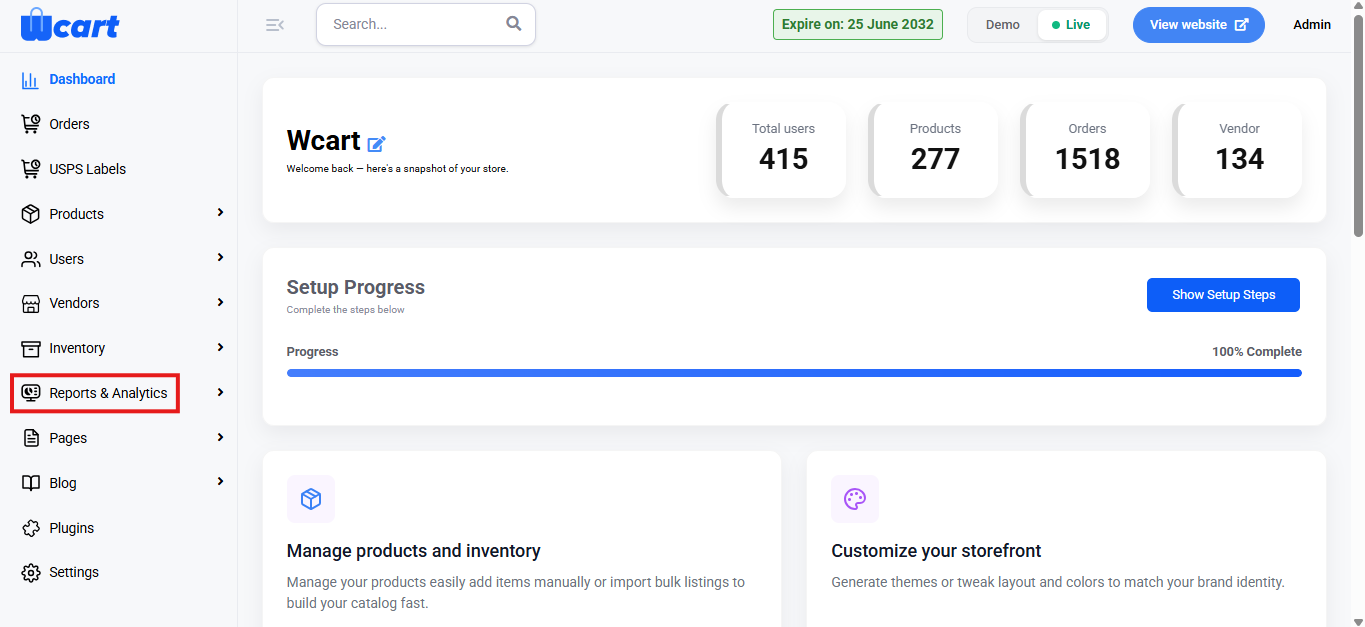
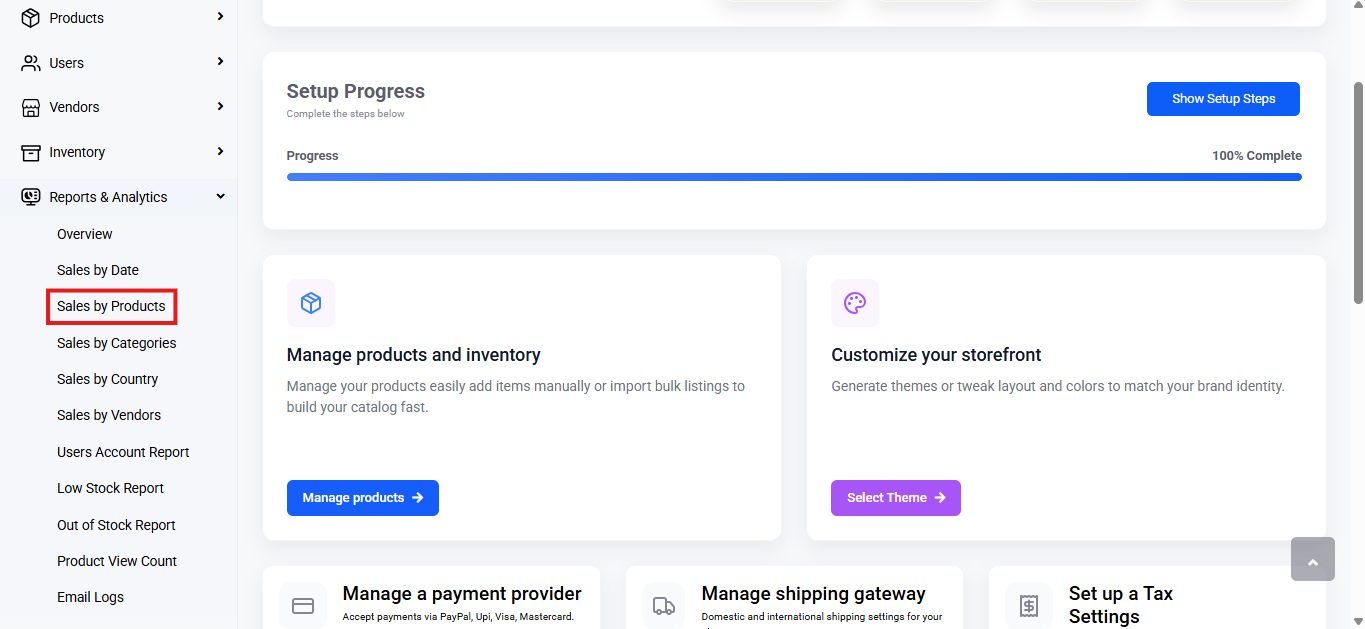
Navigate to the sidebar menu and select ‘Reports & Analytics’.
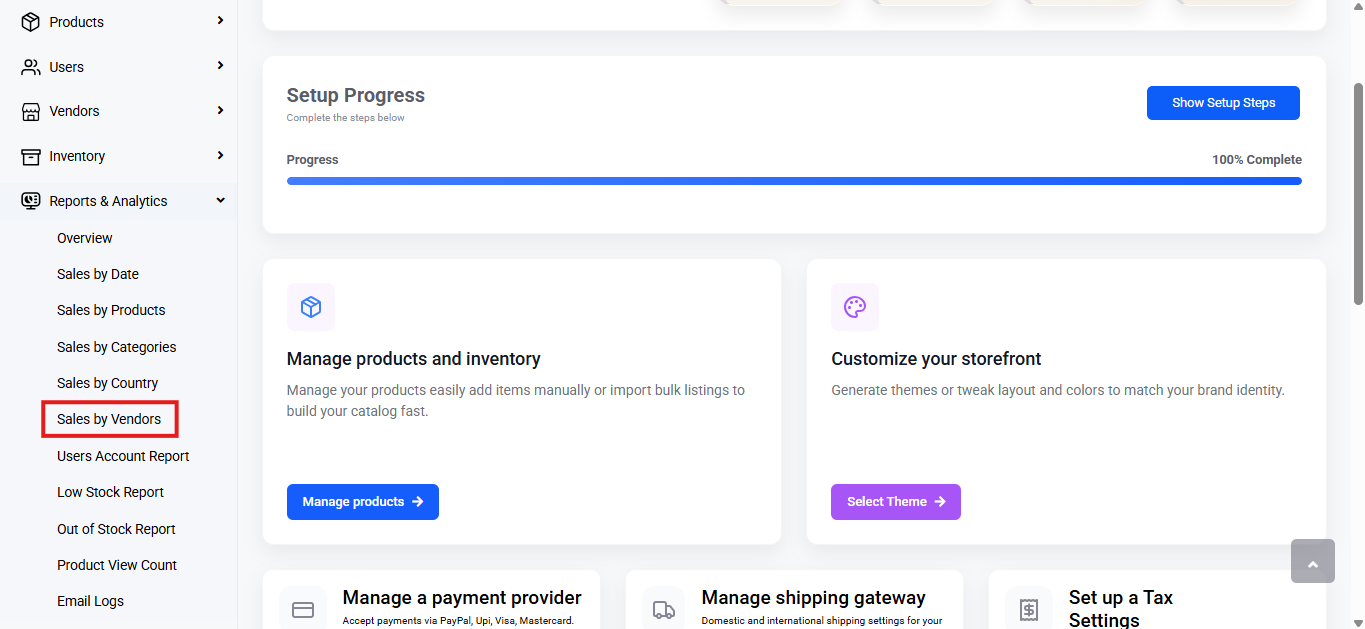
Select ‘Sales by Vendors’ from the submenu.
Range Selector
Purpose: Allows you to filter the dashboard data based on a specific time period.
Options Available:
Today
Yesterday
This Week
Last Week
This Month
Last Month
Custom Range: Select Custom Range to filter data for a specific period.
Choose start (From) and end (To) dates.
Click Submit to apply.
All reports will update based on the selected range.
When a range is selected, all data in the dashboard is updated accordingly.
Report Table:
Shows the following columns:
Product Name: Name of the product from the vendor
Order ID: Unique identification number for the order
Order Date: Date the order was placed
Order Quantity: Number of units ordered for the product
Sales: Total sales amount for the product
Action: Clicking the View button redirects to the Orders Page for further details.
Export
Click ‘Export’ at the top-right corner to export the data. Click Export to download the report.
File Types Available:
CSV
Excel
Choose a format and click Export to download.
It enables efficient tracking and analysis of sales and order performance by vendor, providing valuable insights that support informed decision-making and improve overall operational efficiency.
Displays a breakdown of sales and order count for each country.
To add multiple countries, follow these steps:
Navigate to the sidebar menu and select ‘Reports & Analytics’.
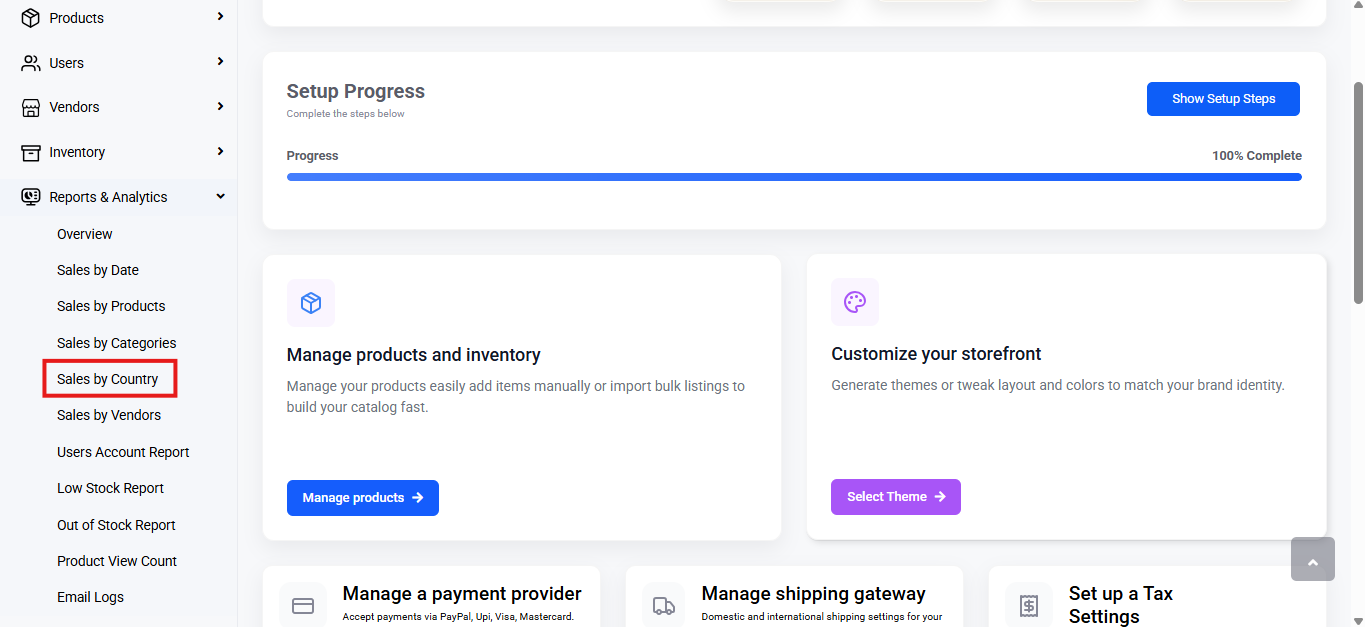
Select ‘Sales by Country’ from the submenu.
Range Selector
Purpose: Allows you to filter the dashboard data based on a specific time period.
Options Available:
Today
Yesterday
This Week
Last Week
This Month
Last Month
Custom Range: Select Custom Range to filter data for a specific period.
Choose start (From) and end (To) dates.
Click Submit to apply.
All reports will update based on the selected range.
When a range is selected, all data in the dashboard is updated accordingly.
Report Table:
Shows the following columns:
Country Name: Name of the country
Order Count: Number of orders placed from the country
Sales: Total sales amount for the country
Action: Clicking the ‘View’ button opens a modal window that provides specific order details, including:
Order ID: Unique identification number for the order
Order Date: Date the order was placed
Total Amount: Total monetary value of the order
View: Redirects to a comprehensive order management page for further details.
Export
Click ‘Export’ at the top-right corner to export the data. Click Export to download the report.
File Types Available:
CSV
Excel
Choose a format and click Export to download.
It enables efficient tracking and analysis of sales and order performance by country, providing valuable insights that support informed decision-making and improve overall operational efficiency.
Displays a breakdown of sales and order count for each product category.
To add multiple product categories, follow these steps:
Navigate to the sidebar menu and select ‘Reports & Analytics’.
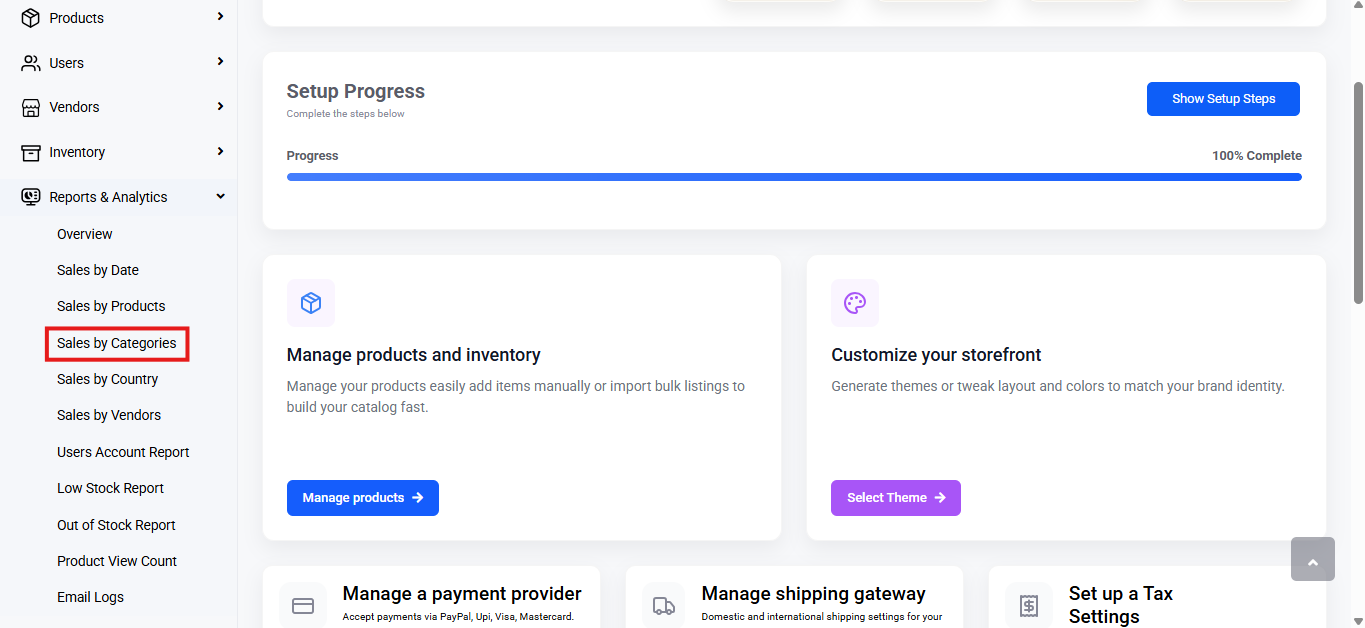
Select ‘Sales by Categories’ from the submenu.
Range Selector
Purpose: Allows you to filter the data based on a specific time period.
Options Available:
Today
Yesterday
This Week
Last Week
This Month
Last Month
Custom Range: Select Custom Range to filter data for a specific period.
Choose start (From) and end (To) dates.
Click Submit to apply.
All reports will update based on the selected range.
When a range is selected, all data in the dashboard is updated accordingly.
Report Table:
Shows the following columns:
Category Name: Name of the product category
Order Quantity: Number of units ordered for the category
Sales: Total sales amount for the category
Action: Clicking the ‘View’ button opens a modal window that provides specific order details, including:
Order ID: Unique identification number for the order
Order Date: Date the order was placed
Product Name: Name of the product ordered
Quantity Sold: Number of units sold in that order
Total Amount: Total monetary value of the order
View: Redirects to a comprehensive order management page for further details.
Export
Click ‘Export’ at the top-right corner to export the data. Click Export to download the report.
File Types Available:
CSV
Excel
Choose a format and click Export to download.
It enables efficient tracking and analysis of sales and order performance by product category, offering valuable insights that support informed decision-making and improve overall operational efficiency.
Displays a breakdown of sales and order count for each product.
To add multiple vendors, follow these steps:
Navigate to the sidebar menu and select ‘Reports & Analytics’.
Select ‘Sales by Product’ from the submenu.
Range Selector
Purpose: Allows you to filter the data based on a specific time period.
Options Available:
Today
Yesterday
This Week
Last Week
This Month
Last Month
Custom Range: Select Custom Range to filter data for a specific period.
Choose start (From) and end (To) dates.
Click Submit to apply.
All reports will update based on the selected range.
When a range is selected, all data in the dashboard is updated accordingly.
Report Table:
Shows the following columns:
Product Name: Name of the product
Order Quantity: Number of units ordered for the product
Sales: Total sales amount for the product
Action: Clicking the ‘View’ button opens a modal window that provides specific order details, including:
Order ID: Unique identification number for the order
Order Date: Date of the order
Quantity Sold: Number of units sold in that order
Total Amount: Total monetary value of the order
View: Redirects to a comprehensive order management page. Click the link given at the end of this section to the guide to orders.
Export
Click ‘Export’ at the top-right corner to export the data. Click Export to download the report.
File Types Available:
CSV
Excel
Choose a format and click Export to download.
It enables efficient tracking and analysis of product sales and order performance, providing valuable insights that support informed decision-making and enhance operational efficiency.
Displays a breakdown of sales and order count based on the selected date range.
To add multiple vendors, follow these steps:
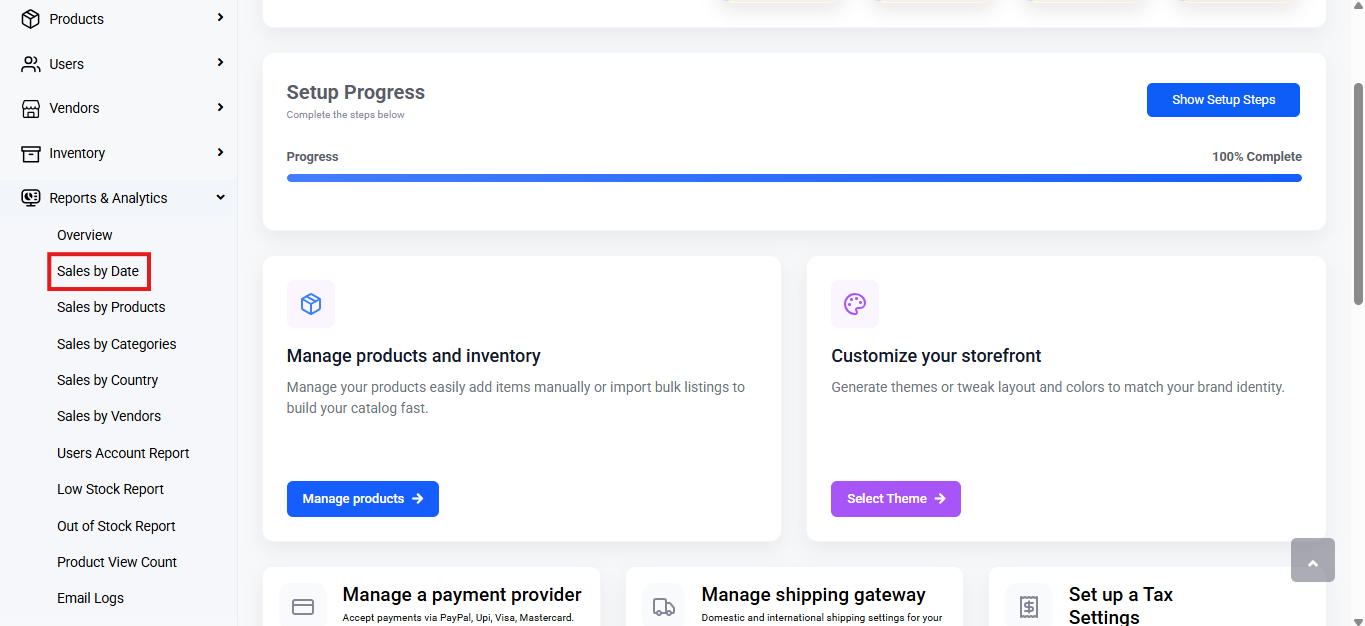
Navigate to the sidebar menu and select ‘Reports & Analytics’.
Select ‘Sales by Date’ from the submenu.
Range Selector
Purpose: Allows you to filter the data based on a specific time period.
Options Available:
Today
Yesterday
This Week
Last Week
This Month
Last Month
Custom Range: Select Custom Range to filter data for a specific period.
Choose start (From) and end (To) dates.
Click Submit to apply.
All reports will update based on the selected range.
When a range is selected, all data in the dashboard is updated accordingly.
Report Table
Shows the following columns:
Order Date: Date of order
Order Count: Number of orders placed
Sales:Total sales amount
Action: Clicking the ‘View’ button will open a modal window to provide specific order details. The modal window has a table that has the following column headers:
Order ID: Unique identification number for the order.
Name: Name of the customer associated with the order.
Email: Email address of the customer associated with the order.
View: Redirects to a comprehensive order management page.
This order management page has a table with various columns to interpret orders data quickly and accurately. The columns are listed below:
S.No: Serial number of the order record.
Order Map ID: Unique internal mapping ID for the order.
Order Date: Date the order was placed.
Buyer Name: Name of the customer who placed the order.
Total Amount: Total monetary value of the order, including the currency.
Payment Mode: Method of payment used for the order. The options are mentioned below:
Checkout.com
Adyen
PayU
PayHere
Cashfree
PayPal
Pesapal
Stripe
Razorpay
Cash on delivery
Order Status
Order Status: Current status of the order. The options are mentioned below:
Pending Payment
Processing
Ready to Ship
Ready to Pickup
In Transit
Delivered
Failed
Cancel Initiated By Customer
Cancelled
Refund Initiated By Customer
Refund Accepted By Admin
Initiate Pickup From Customer
Picked Product From Customer
Product Received and Refund Initiated
Refund Completed
Exchange Initiated By Customer
Exchange Accepted By Admin
Exchange Pickup From Customer
Exchange Product Picked From Customer
Exchange Product Received
Exchange Ready to Ship
Exchange Ready to Pickup
Exchange In Transit
Exchange Delivered
Exchange Order Placed
Action: Redirects to the orders module to view complete order details.
Export
Click ‘Export’ at the top-right corner to export the data. Click Export to download the report.
File Types Available:
CSV
Excel
Choose a format and click Export to download.
It enables efficient tracking and analysis of product sales and order performance, providing valuable insights that support informed decision-making and enhance operational efficiency.
This section is used to create interactive promotional campaigns that allow users to spin and win rewards. It provides options to configure reward emails, manage events and track user form submissions from the admin panel.
It has three navigation tabs: ‘Settings’, ‘Events’ and ‘Form Submission’. Each is detailed below.
To configure, follow these steps:
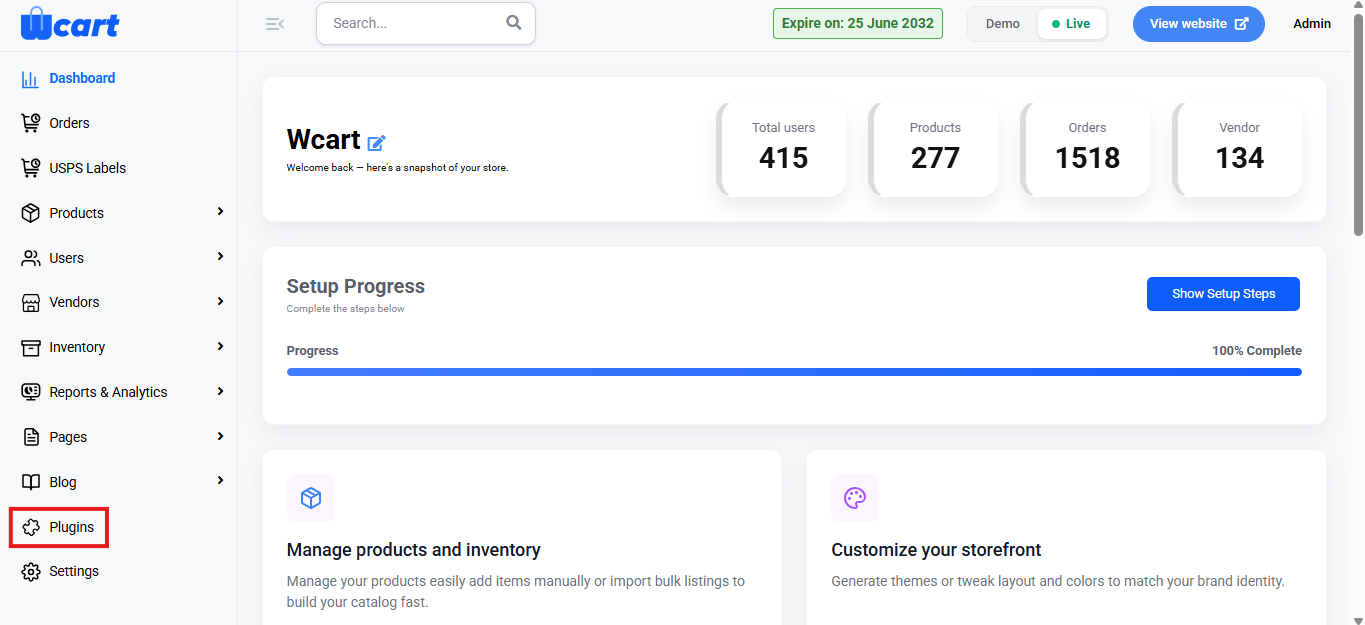
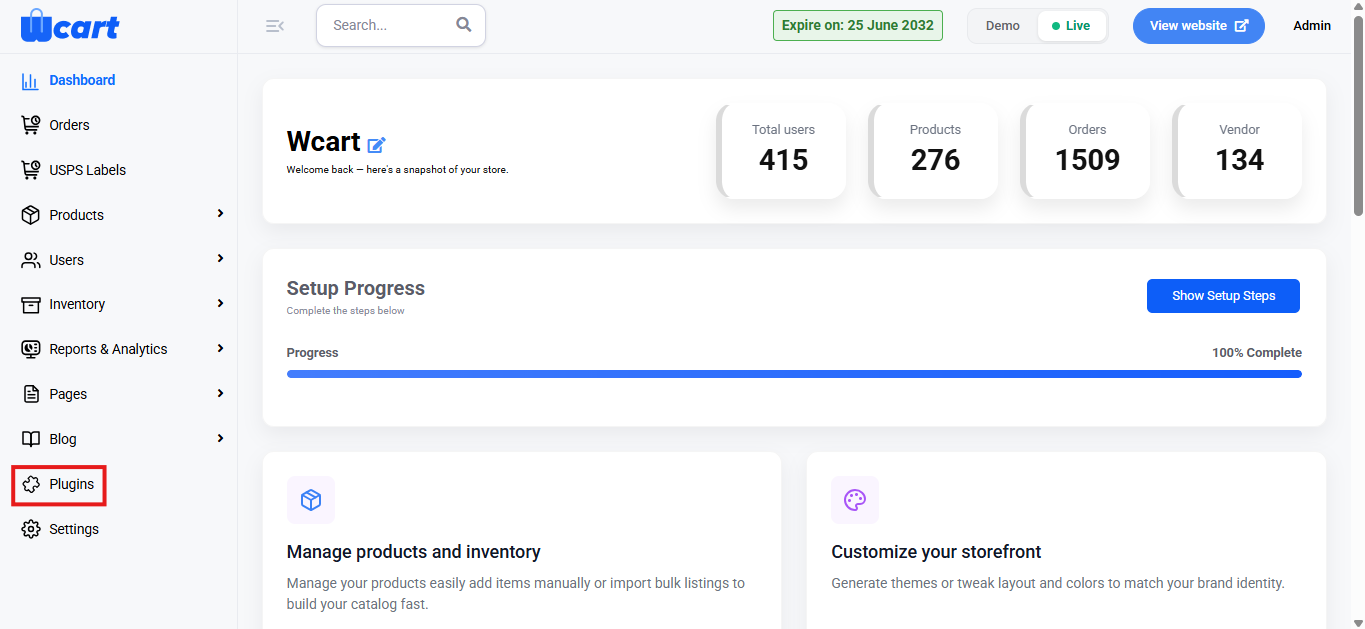
Navigate to the sidebar menu and select ‘Plugins’.
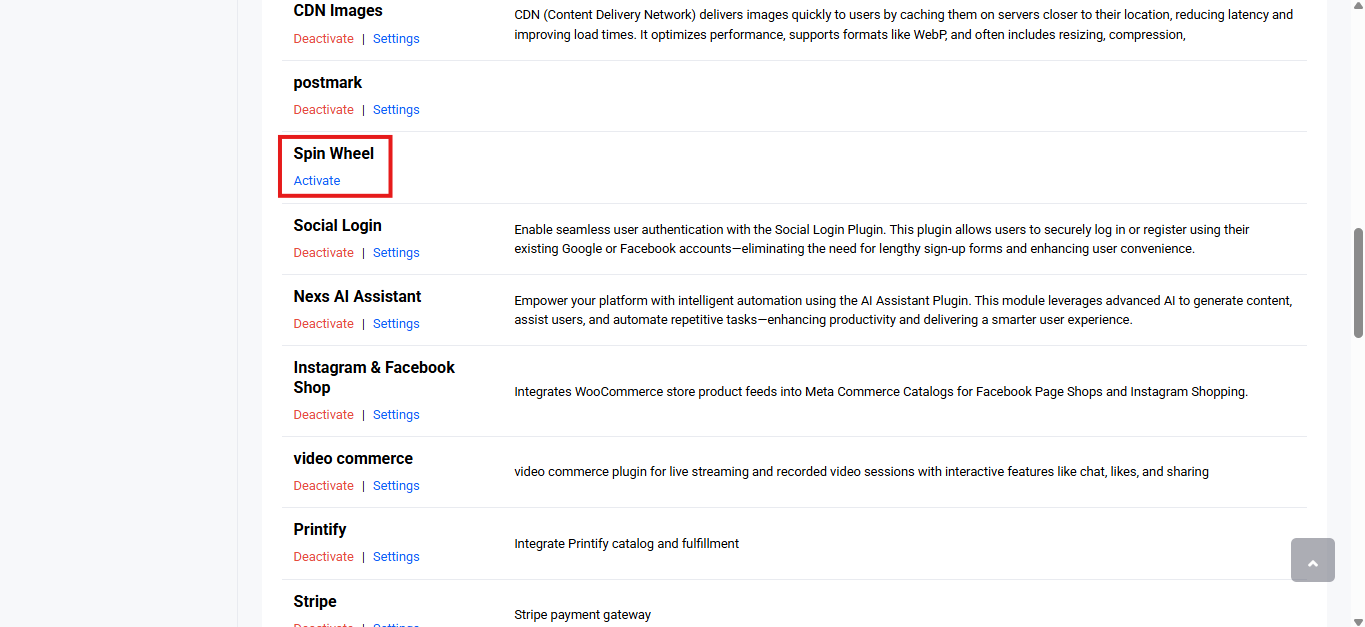
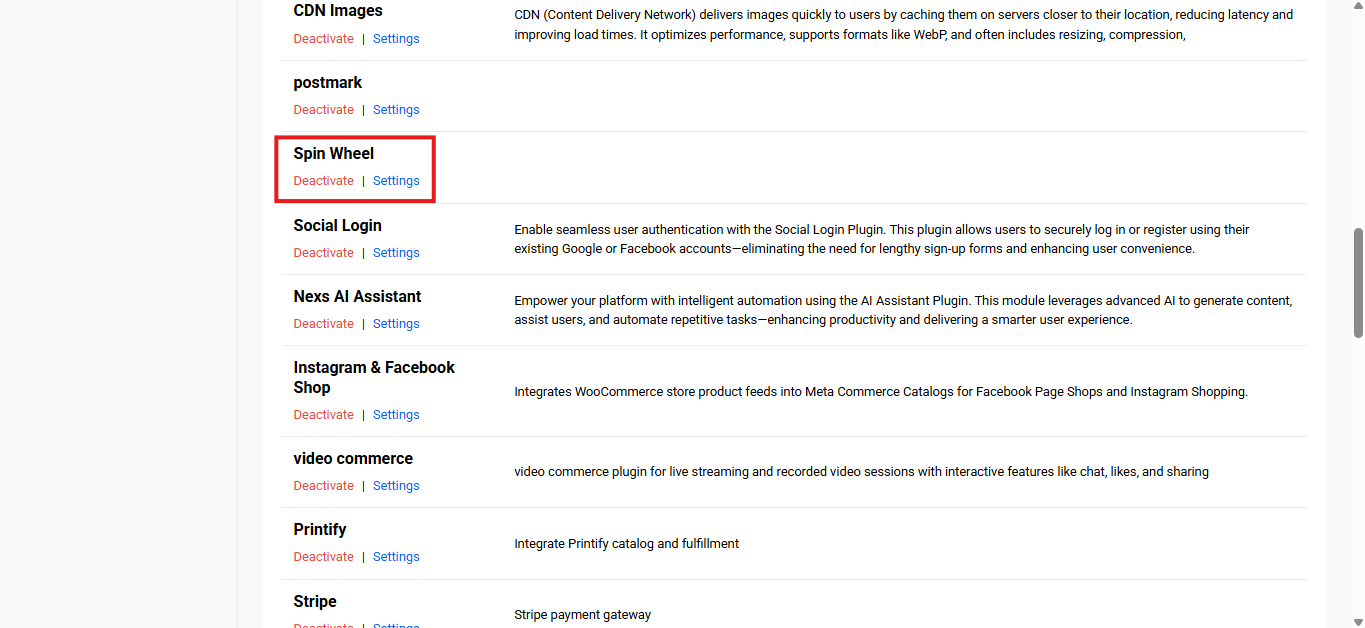
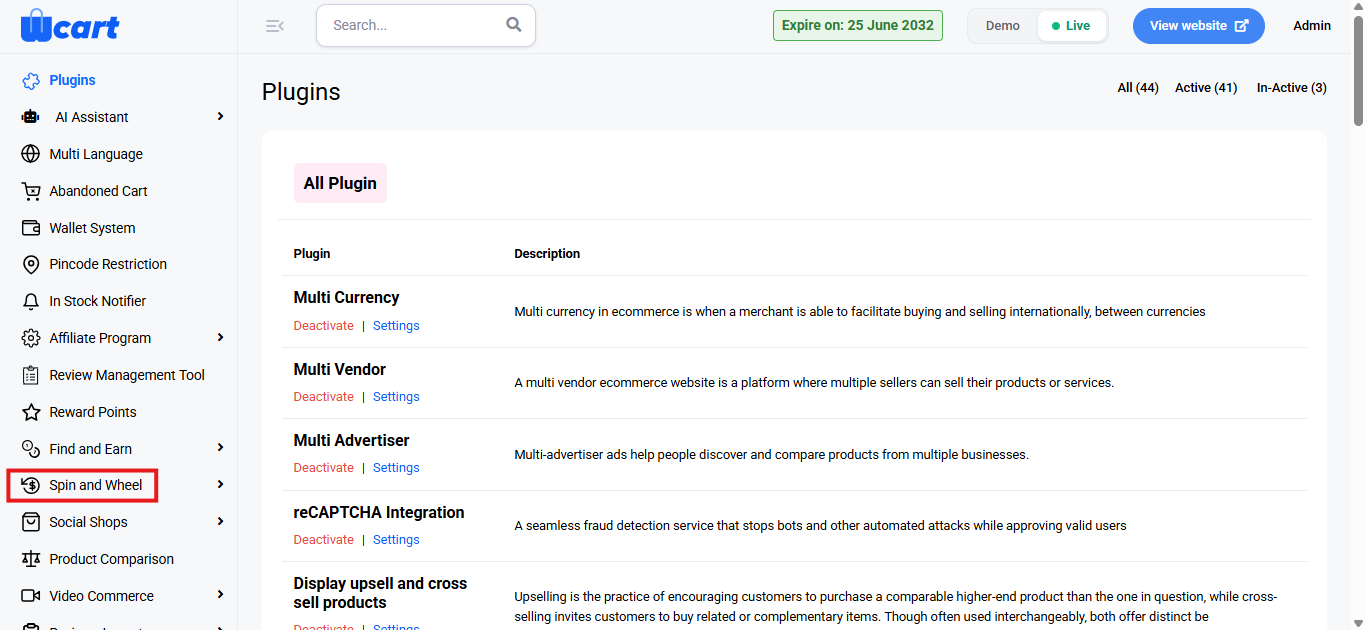
Locate ‘Spin Wheel’ and click ‘Activate’. You will now see two options: ‘Deactivate’ and ‘Settings’. When you click ‘Activate’ or ‘Deactivate’, a toast notification showing ‘Spin Wheel Plugin Activated’ or ‘Spin Wheel Plugin Deactivated’ will appear to confirm that the plugin has been activated or deactivated. You can configure ‘Spin Wheel’ by clicking ‘Settings’ or by selecting ‘Spin Wheel’ from the left sidebar menu after activation.
Settings
The Settings section is used to configure the reward email content that users receive after winning a spin wheel reward.
Item Reward Mail
This allows you to define the email message sent to users when they win an item or reward.
Submit
Once saved, this email template will be automatically used whenever a reward mail is triggered for a spin wheel event. A toast notification ‘Spin Wheel Settings Updated’ will appear to confirm the update.
Events
Allows you to to create, schedule and manage spin wheel campaigns by defining their active period, behavior and reward settings.
Adding Spin Wheel
Click on the ‘+ Add Spin Wheel’ button at the top-right corner to create a new spin wheel event.
Title: Enter the name of the spin wheel event.
Status: Use the dropdown to enable or disable the spin wheel event.
Enable: The spin wheel event is active and visible to users.
Disable: The spin wheel event is inactive and will not be shown to users.
Start Date: Select the date from which the spin wheel event should become active.
End Date: Select the date on which the spin wheel event should expire. After this date, the event will no longer be available to users.
Spin Sound: Choose the sound effect that plays while the wheel is spinning.
Smooth Rotation: Provides a continuous and smooth spinning sound effect.
Bouncing Stop: Plays a sound that mimics a bouncing effect as the wheel slows down.
Elastic Stop: Adds an elastic-style sound effect when the wheel comes to a stop.
Flash Effect: Uses a quick, sharp sound effect for a dynamic spinning experience.
Win Animation: Select the animation effect displayed when a user wins a reward.
Spin Duration (Sound Effect 1): Define the duration for the first stage of the spin sound effect.
Spin Duration (Sound Effect 2): Define the duration for the second stage of the spin sound effect.
Spin Duration (Sound Effect 3): Define the duration for the third stage of the spin sound effect.
Spin Duration (Sound Effect 4): Define the duration for the fourth stage of the spin sound effect.
Number of Slice: Enter the total number of slices (reward segments) to be displayed on the spin wheel.
Max Spins per User: Specify the maximum number of times a single user is allowed to spin the wheel.
Send Email: Choose whether reward emails should be sent to users after winning.
Yes: Users will receive a reward email.
No: No email will be sent after winning.
Save & Continue: Saves the spin wheel configuration and creates the event. A toast notification ‘Spin Wheel Setting Added Successfully’ will appear to confirm the addition.
Spin Wheel: The number of spin wheel slices you have selected will appear here, allowing you to choose which coupon to assign to each slice.
Now return to the all events section. You will find a table with various columns to interpret all spin wheel events data quickly and accurately. The columns are listed below:
S.No: Serial number of the row in the current view.
Title: Displays the name of the spin wheel event.
Start Date: Shows the date on which the spin wheel event starts.
End Date: Shows the date on which the spin wheel event ends.
Send Mail: Indicates whether reward emails are enabled for the event.
Yes: Email notifications are enabled.
No: Email notifications are disabled.
Status: Displays the current status of the event.
Active: The event is currently live.
Inactive: The event is not active.
Action: Provides icons for quick actions related to each spin wheel event.
Edit: Opens the spin wheel setting form to update event details. The form fields are the same as those shown in the ‘Add Spin Wheel’ section.
Delete: Deletes the category. A dialog box ‘Remove Spin Wheel’ will appear with the text ‘Are you sure you want to delete this Spin Wheel?’ along with ‘Close’ and ‘Delete’ options. Closing will remove the dialog box and clicking on ‘Delete’ will display this toast notification ‘Removed Spin Wheel Successfully’ to confirm deletion.
Preview: It opens the spin wheel’s frontend view.
Form Submission
This section allows users to view and manage the participants who have filled out the spin wheel form. It enables users to easily track and take action on form submissions.
S.No: The serial number of the entry.
Name: The name of the participant who submitted the form.
Email ID: The email address provided by the participant.
Action: The action column contains a trash icon to delete the form submission if necessary. A dialog box ‘Remove Spin Wheel’ will appear with the text ‘Are you sure you want to delete this Spin Wheel?’ along with ‘Close’ and ‘Delete’ options. Closing will remove the dialog box and clicking on ‘Delete’ will display this toast notification ‘Removed Spin Wheel Entries Successfully’ to confirm deletion.
Overall, the ‘Spin Wheel’ section enables administrators to efficiently create, manage and control spin wheel campaigns, ensuring engaging promotions and smooth participant tracking.
This section enables efficient management of events within the ‘Find and Earn’ program by adding, editing and organizing event details. It ensures smooth tracking and customization of events to enhance user engagement and experience.
To configure, follow these steps:
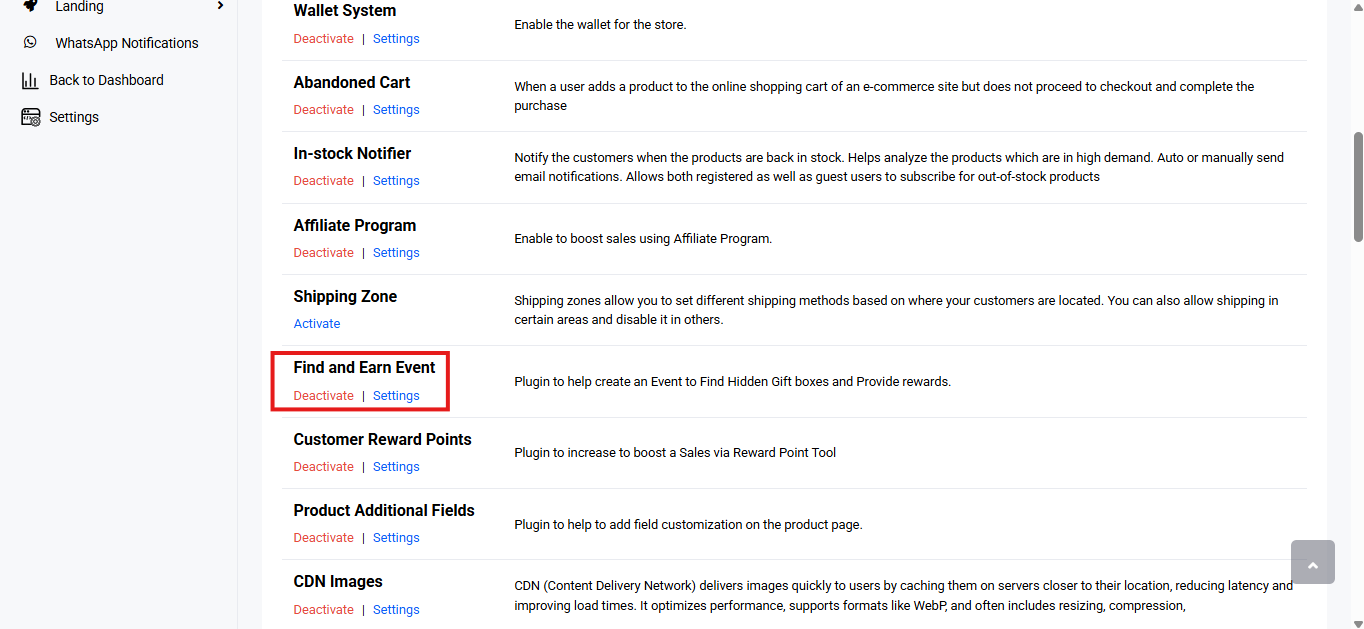
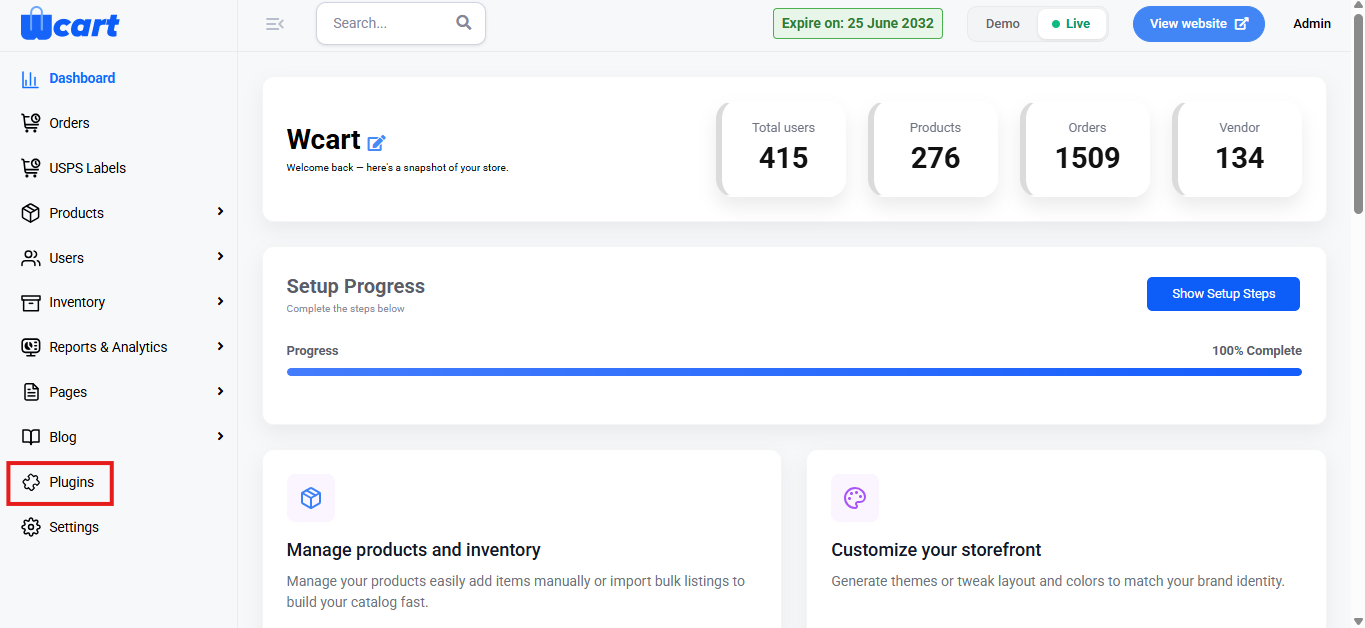
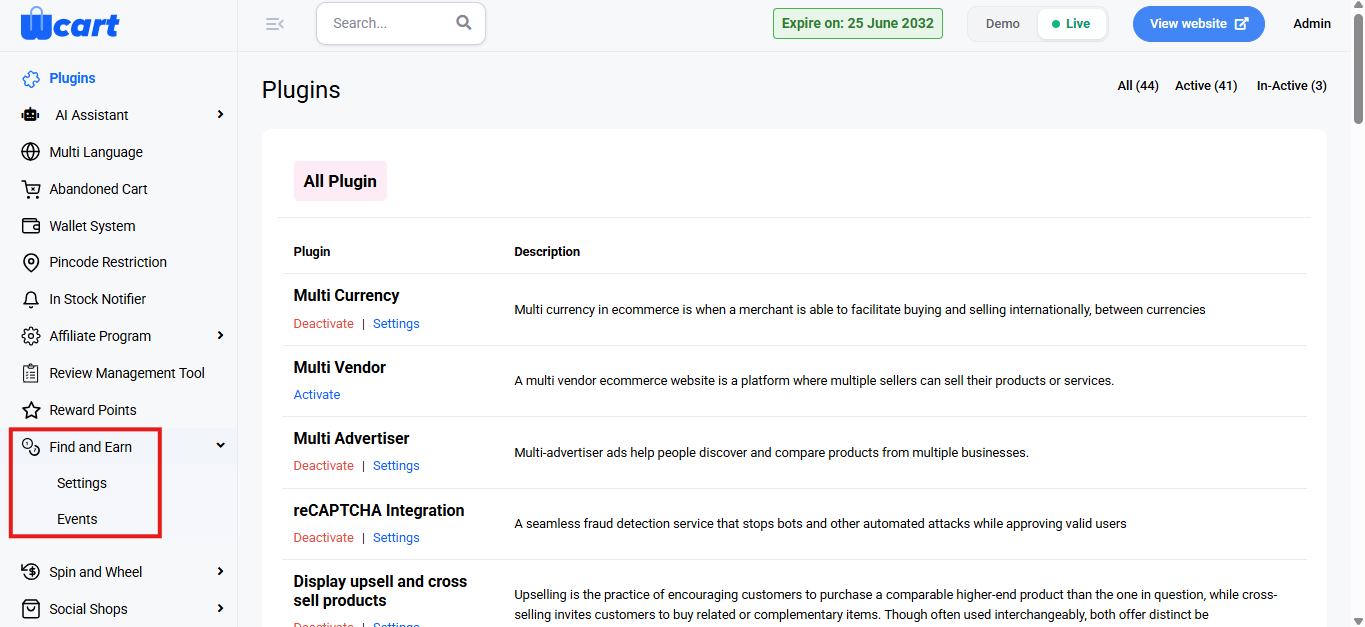
Navigate to the sidebar menu, click ‘Plugins’.
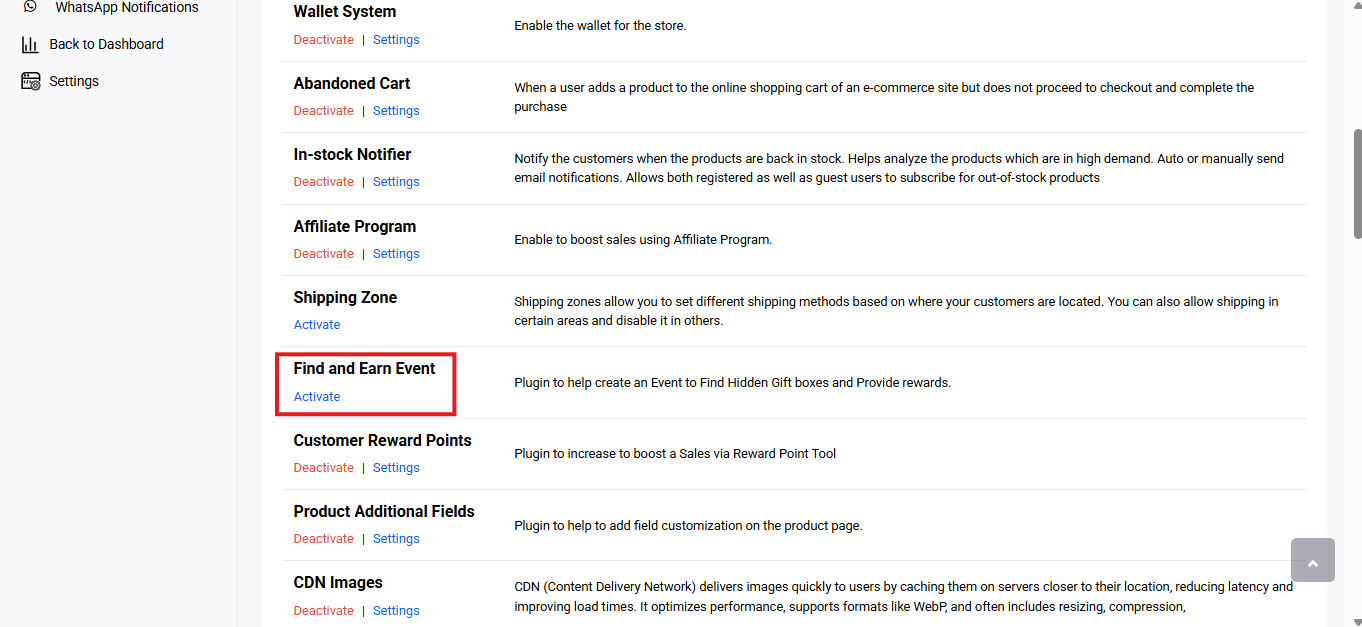
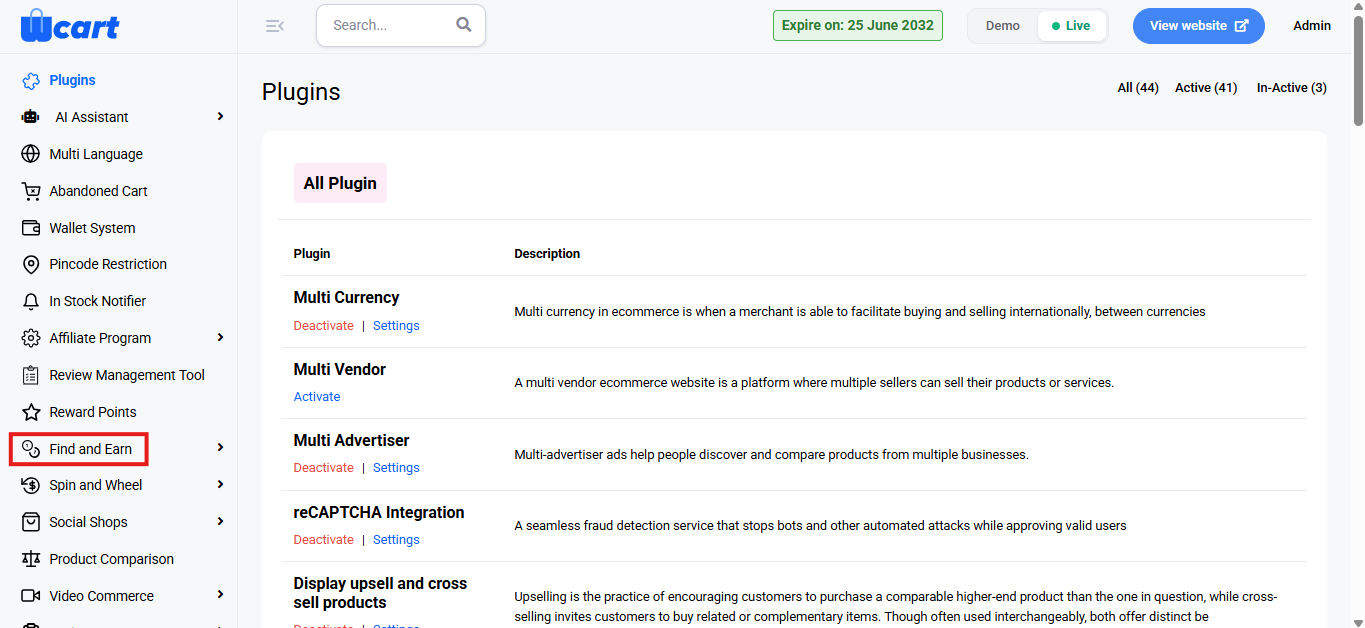
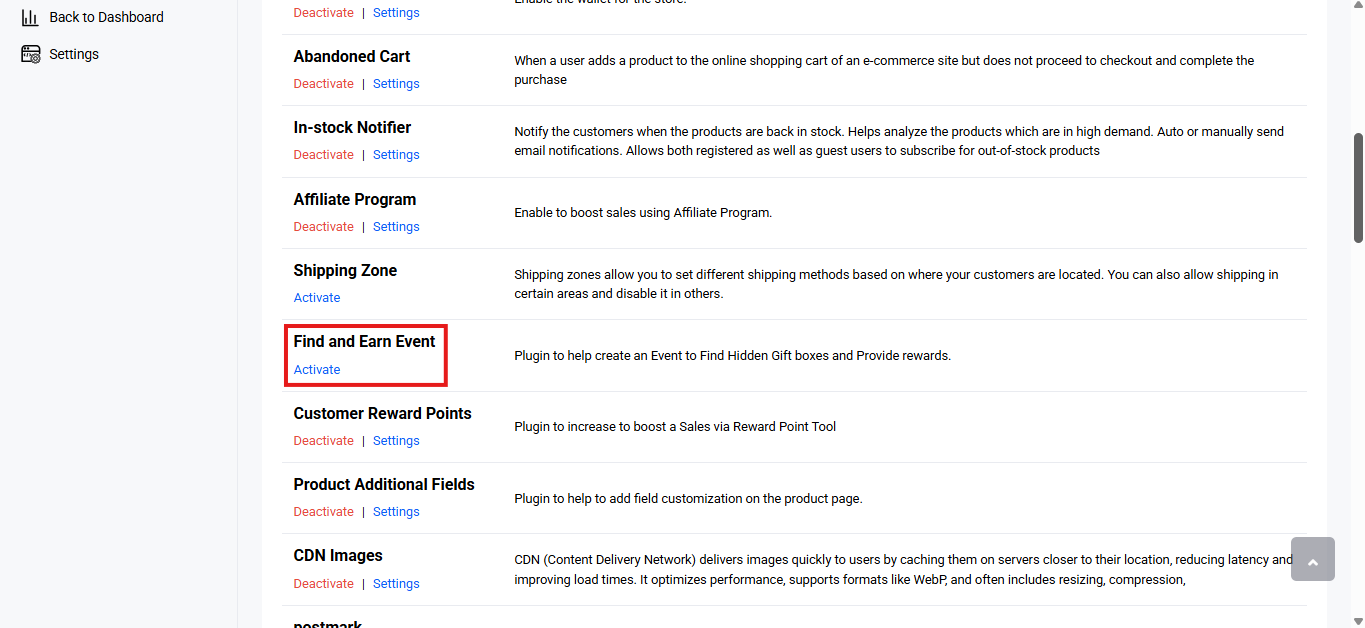
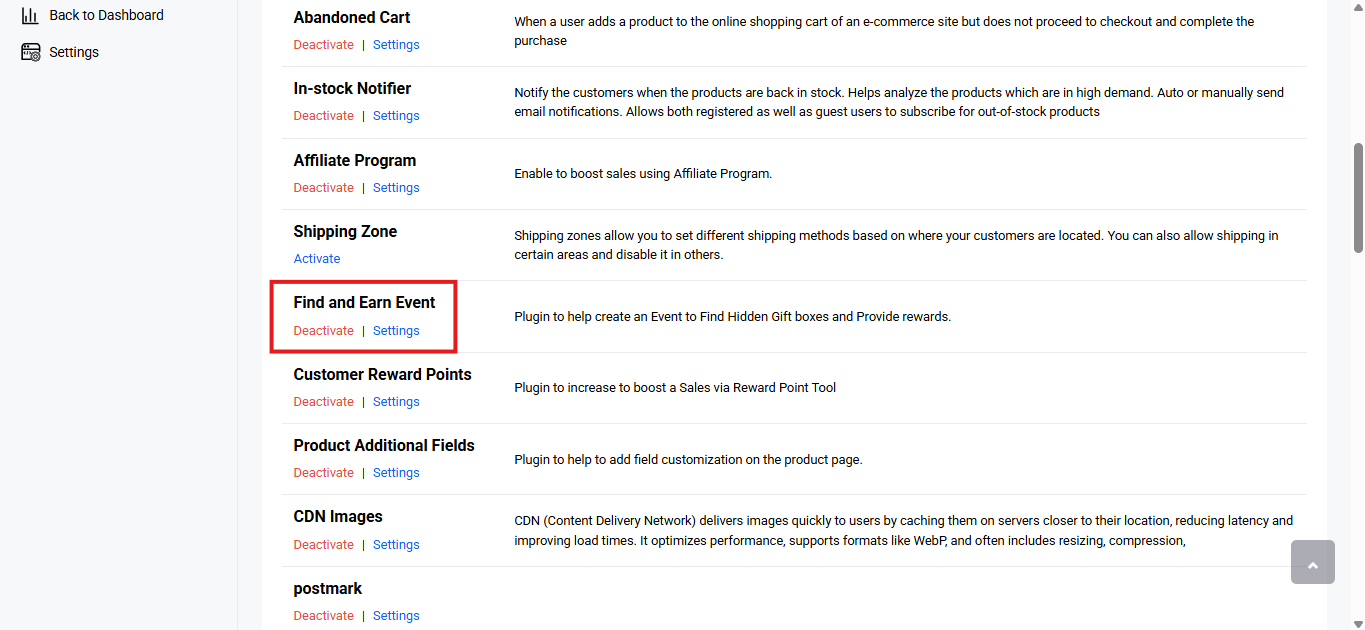
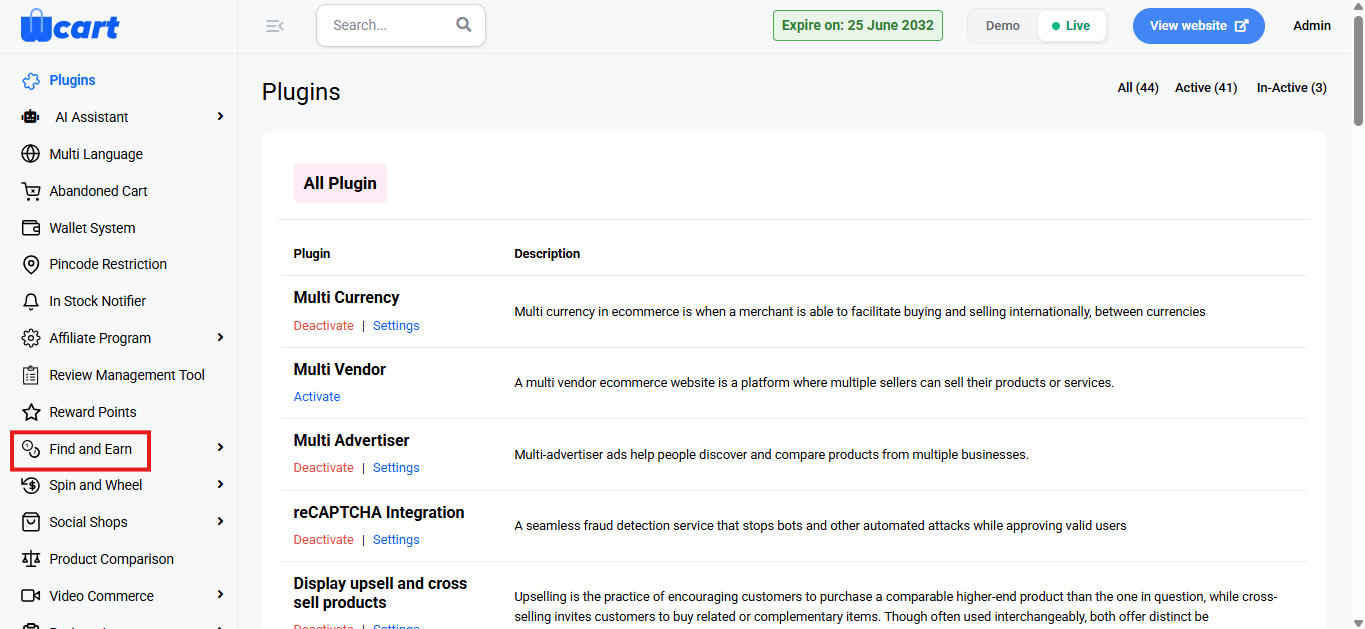
Locate ‘Find and Earn’ and click ‘Activate’. You will now see two options: ‘Deactivate’ and ‘Settings’. When you click ‘Activate’ or ‘Deactivate’, a toast notification showing ‘Find and Earn Event Plugin Activated’ or ‘Find and Earn Event Plugin Deactivated’ will appear to confirm that the plugin has been activated or deactivated. You can configure ‘Find and Earn’ by clicking ‘Settings’ or by selecting ‘Spin Wheel’ from the left sidebar menu after activation.
You will find the options mentioned below on the page to add and manage ‘Events’.
Adding Events
Click on the ‘+ Add Event’ button at the top-right corner to add new tags.
Title: Enter the name of the event. This is a mandatory field. If left empty, an alert message will appear saying ‘Please provide Title’.
Status: Allows you to toggle the event’s visibility by selecting one of the following options from the dropdown:
Enable: Activates the event, making it visible and accessible to users.
Disable: Deactivates the event, making it unavailable for users.
Start Date: Select the start date of the event using the date picker. This is a required field.
End Date: Select the end date of the event using the date picker. This is a required field.
Coupon Code: Enter a unique coupon code for the event. This is a required field.
Coupon Value: Specify the value of the coupon. This is an optional field.
Coupon Limit: Set the limit for the number of times the coupon can be used. This is an optional field.
Number of Items: Enter the number of items associated with the event. This is an optional field.
Description (Optional): Provide a description for the event. This is an optional field where you can add additional information about the event.
Save & Continue: Click this button to save the event details. A toast notification ‘Event Added Successfully’ will appear to confirm the addition.
Now return to the all events section. You will find a table with various columns to interpret events data quickly and accurately. The columns are listed below:
S.No: Displays the serial number of each event.
Title: Displays the title of the event.
Status: Allows you to toggle the event’s visibility by selecting one of the following options:
Active: Activates the event, making it visible and accessible to users.
Inactive: Deactivates the event, making it unavailable for users.
Action: Manage the event with the following options:
Edit: Click the ‘Edit’ icon to modify the event details.
The same form fields from ‘Add Event’ will be available. After making changes, click the button to update the event. A toast notification ‘Event Updated Successfully’ will appear to confirm the update.
Additionally, there are two other navigation tabs to configure: ‘Gift Items’ and ‘Custom Messages’.
You will find the options mentioned below on the page to add and manage ‘Events’.
Adding Event Items
Click on the ‘+ Add Item’ button to add a new event item.
Display Content: Click ‘Choose File’ to upload the content that will be displayed for the event item. This is a mandatory field.
Open Display Content: Click ‘Choose File’ to upload additional content that will be opened for this event item. This is optional.
Element Type: Select the type of element for the event item. Available options include:
Category Page
Product Page
Placement Type: Specify the placement of the event item.
Placement Position: Choose where the event item will be placed on the page:
Enable Coupon: Select whether the coupon will be enabled for this event item:
Enable: Activates the coupon for this event item.
Disable: Deactivates the coupon for this event item.
Coupon Settings: These options are only available after enabling the coupon:
Coupon Code: Enter a unique code for the event coupon. This is a required field.
Coupon Value: Specify the value of the coupon. This field is optional and can be left empty if no value is assigned.
Coupon Limit: Set the limit for how many times the coupon can be used. This is an optional field. If not specified, there will be no usage limit for the coupon.
Hint for Next Gift: Enter a hint for the next gift that users will be able to find. This field is optional.
Description (Optional): Provide additional information about the event item. This is optional.
Add: Click this button to save the event item. A toast notification ‘Item Added Successfully’ will appear to confirm the addition.
Cancel: Click to discard the changes.
You will find a table with various columns to interpret all gift items data quickly and accurately. The columns are listed below:
S.No: Serial number of the row in the current view.
Display Content: Displays images related to the event, indicating what content will be shown.
Element Type: Specifies the page type where the event will be placed, such as “Category Page” or “Product Page”.
Placement View: Provides an icon to indicate where the event will be visible (e.g., product or category page).
Coupon Status: Displays whether the event is associated with a coupon (“Yes” or “No”).
Action: Provides icons for quick actions related to each event. The following icons are available under this column:
Edit: The same form fields available in ‘Add Event’ are also present here for configuration.
Delete: Deletes the category. A dialog box ‘Remove Event’ will appear with the text ‘Are you sure you want to delete this Event Item ?’ along with ‘Close’ and ‘Delete’ options. Closing will remove the dialog box and clicking on ‘Delete’ will display this toast notification ‘Event Item Deleted Successfully’ to confirm deletion.
Custom Messages: The same fields available in the ‘Settings’ tab are also available here for configuration. The only new addition is the button ‘Click here to enable Custom Email Messages for the Event items.’ Enabling this will send the messages to the users.
Preview: View detailed submissions for a specific user.
S.No: Displays the serial number of each submission.
User Name: Shows the name of the user who participated in the event.
Email ID: Displays the user’s email address.
Items Found: Shows the number of items the user has found for the event.
Won Complete: Indicates whether the user has completed the event and won any prizes, with two options:
Yes: The user has completed the event and won a prize.
No: The user has not completed the event or has not won a prize.
Action: indicates whether the user has won a gift for the event item, with two options:
S.No: Displays the serial number of the event item.
Event Item ID: Displays the unique ID for each event item.
Gift Win: Indicates whether the user has completed the event and won any prizes, with two options:
Delete:
Delete:Deletes the category. A dialog box ‘Remove Event’ will appear with the text ‘Are you sure you want to delete this Event?’ along with ‘Close’ and ‘Delete’ options. Closing will remove the dialog box and clicking on ‘Delete’ will display this toast notification ‘Event Deleted Successfully’ to confirm deletion.
This efficiently manages events, boosting user engagement with easy customization and updates. It enables smooth event configuration, coupon management and custom messaging.
It displays a list of all the additional product fields configured in the system.
To add Product Additional Fields, follow these steps:
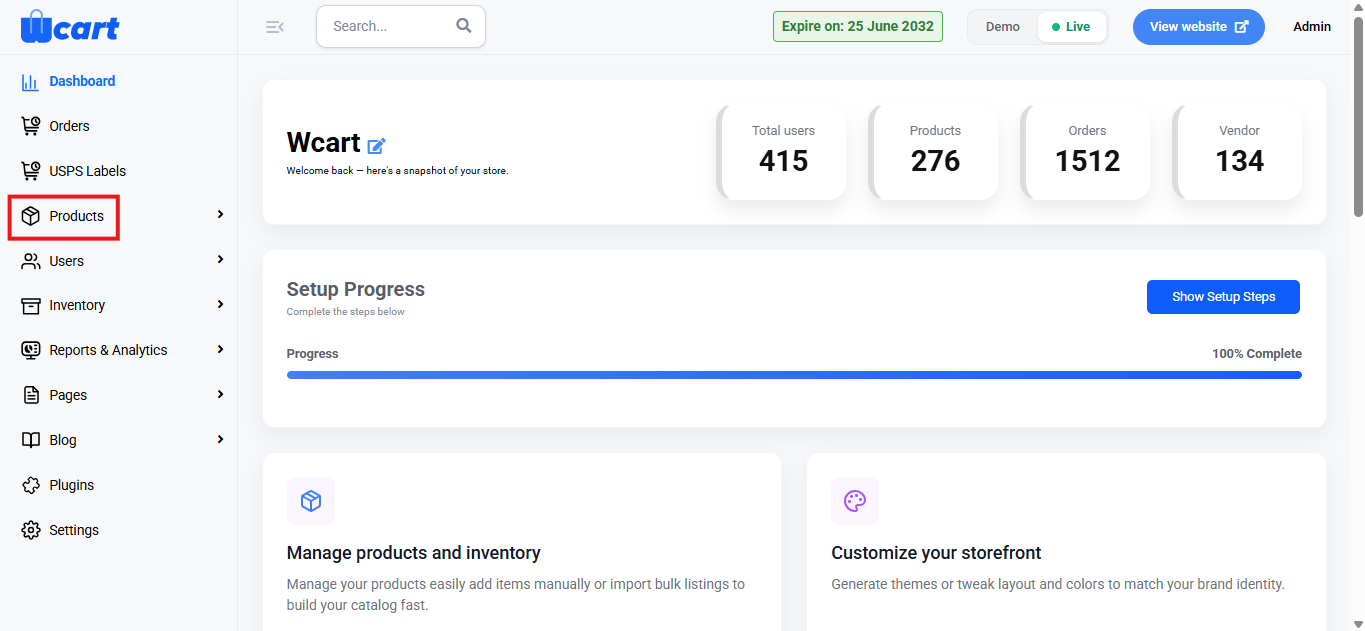
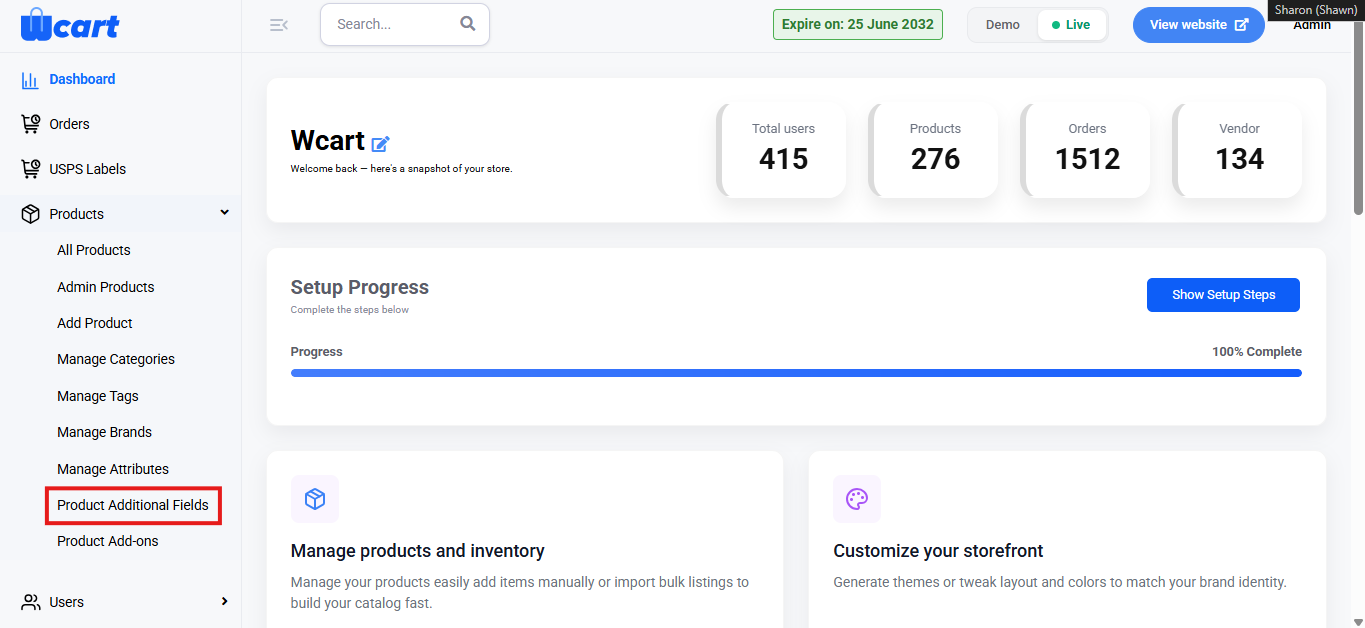
Navigate to the sidebar menu and select ‘Products’.
Select ‘Product Additional Fields ’ from the submenu.
Add New Product Additional Fields: Clicking on ‘+ Product Additional Fields’ will open a popup with the following form fields:
Product Type: Dropdown to select applicable product types. This is a mandatory field, not entering the input will display an alert message ‘Please Provide Product Type’.
Simple: Basic product type without variations.
Variable: Product with different variations.
Downloadable: Product that can be delivered digitally.
Field Type: Dropdown to select the type of field. This is a mandatory field, not entering the input will display an alert message ‘Please Provide Field Type’.
Text
Number
Tel
URL
Date
Email
Select
Checkbox
Radio
Field Name: The internal reference name for the field. This is a mandatory field, not entering the input will display an alert message ‘Please Provide Field Name’.
Field Label: The display name shown to users. This is a mandatory field, not entering the input will display an alert message ‘Please Provide Field Label’.
Field Label CSS: Apply custom CSS styles to the field’s label.
Field Input CSS: Apply CSS styles to the input box used for user data entry.
Field alert Msg: Text displayed if a required field is left empty or invalid input is entered. This is a mandatory field, not entering the input will display an alert message ‘Please Provide Field alert msg’.
Placement Area: Dropdown to choose placement location.
Before Single Product
Before Single Product Summary
Before Short Description
Before add to Cart Form
Before add to Cart quantity
Before add to Cart button
After add to Cart button
After add to Cart quantity
After add to Cart form
After Single Product Summary
After Single Product
Placement Order: Numeric input to define the order of appearance.
Field Required: Determines if the user must fill in the field with the two options below:
Yes: Users must fill this field before submitting.
No: Field is optional.
Field Status: Controls the visibility of the field on the product page with the two options below:
Show: Field will be visible on the product page.
Hidden: Field exists but will be invisible to users.
Enable for Variations: Shows the additional field on each variation of a variable product. The two options are:
Yes: The field will appear for every variation within a variable product.
No: The field will appear only at the main product level, not on individual variations.
Submit: Click to update your inputs. A toast notification ‘Product Additional Added Successfully’ will appear to confirm the addition.
In the ‘All Product Additional Fields’ section you will find a table with various columns to interpret product additional field data quickly and accurately. The columns are listed below:
S.No: Serial number of the row in the current view.
Product Type: Indicates the applicable product types.
Field Type: Specifies the data input type for the field.
Field Name: The backend identifier for the field.
Field Label: The name displayed to the user on the product page.
Required: Specifies if the field must be filled by the user during product creation. The options are:
Required: Users must enter a value.
Unrequired: Users can leave the field empty.
Status: Controls the visibility of the field on the product page. The options are:
Active: Field will be displayed to users.
Inactive: Field will be hidden from users.
Action: Product additional fields can be managed using these two buttons:
Edit: ‘Update Product Additional Fields’ modal form will open to update changes in all the fields mentioned above.
Delete: Deletes the category. A dialog box ‘Remove Product Additional Field’ will appear with the text ‘Are you sure you want to delete this Product Additional Field? along with ‘Close’ and ‘Delete’ options. Closing will remove the dialog box and clicking on ‘Delete’ will display this toast notification ‘Removed Additional Product Field Successfully’ to confirm deletion.
Overall, this section enables administrators to efficiently create, manage, and control additional product fields, ensuring flexible product customization and accurate data capture across the product page.
Find and Earn lets admins customize messages and email templates for users based on their progress, with dynamic short tags for personalization. It includes two areas: Settings, which provides an overview of message templates, and Events, which helps manage and track active events. This section details ‘Settings’. The link to the ‘Events’ guide is provided at the end of this section.
To configure, follow these steps:
Navigate to the sidebar menu and select ‘Plugins’.
Locate ‘Find and Earn’ and click ‘Activate’. You will now see two options: ‘Deactivate’ and ‘Settings’. When you click ‘Activate’ or ‘Deactivate’, a toast notification showing ‘Find and Earn Event Plugin Activated’ or ‘Find and Earn Event Plugin Deactivated’ will appear to confirm that the plugin has been activated or deactivated. You can configure ‘Find and Earn’ by clicking ‘Settings’ after activation.
After activation, it will appear in the ‘Plugins’ section of the sidebar menu, where ‘Settings’ and ‘Events’ are available for configuration.
Settings
Find Message
This template controls the message displayed when a user finds a gift in the event. You can customize the wording and insert Short Tags where dynamic information is needed.
Find Mail
This template manages the email sent to the user upon finding a gift. Use the editor to update the content and include Short Tags for personalization.
Item Reward Message
Displayed when a user finds a reward item associated with a coupon. Admins can modify this message and attach Short Tags related to reward details.
Item Reward Mail
Sent through email whenever a user receives a reward that includes a coupon code. You may update the message and insert Short Tags such as coupon value or code.
Complete Reward Message
Shown to users when they successfully find all required items in the event and earn the final reward. This template supports full customization via the editor.
Complete Reward Mail
Email notification sent when the user completes the event and receives the final reward. Admins can edit the content and include Short Tags for final coupon details.
Item Limit Reached Message
Displayed when the user reaches the item search limit for the event. You may adjust this message to guide the user or provide additional instructions.
Item Limit Reached Mail
This email is sent when a user hits the item limit. Customize the message and insert Short Tags to reflect event status.
Complete Limit Reached Message
Shown when the user reaches the total event participation limit. The editor allows you to modify text formatting and message tone.
Complete Limit Reached Mail
Email sent when the user has exhausted all event attempts. Short Tags can be used for username or other event data.
Already Opened Message
Displayed when a user attempts to open a gift they have already accessed. Admins can personalize the message and insert dynamic tags.
Editing Messages
The editor provides tools that allow you to adjust the visual presentation of your message, improve readability, and structure information in a clear and organized way. You can format the text as needed to create a polished and user-friendly message.
Submit
A toast notification such as ‘Find and Earn Settings Updated’ will appear to confirm the update.
This section allows you to customize event-related communications, ensuring personalized and dynamic messaging for users throughout the event.
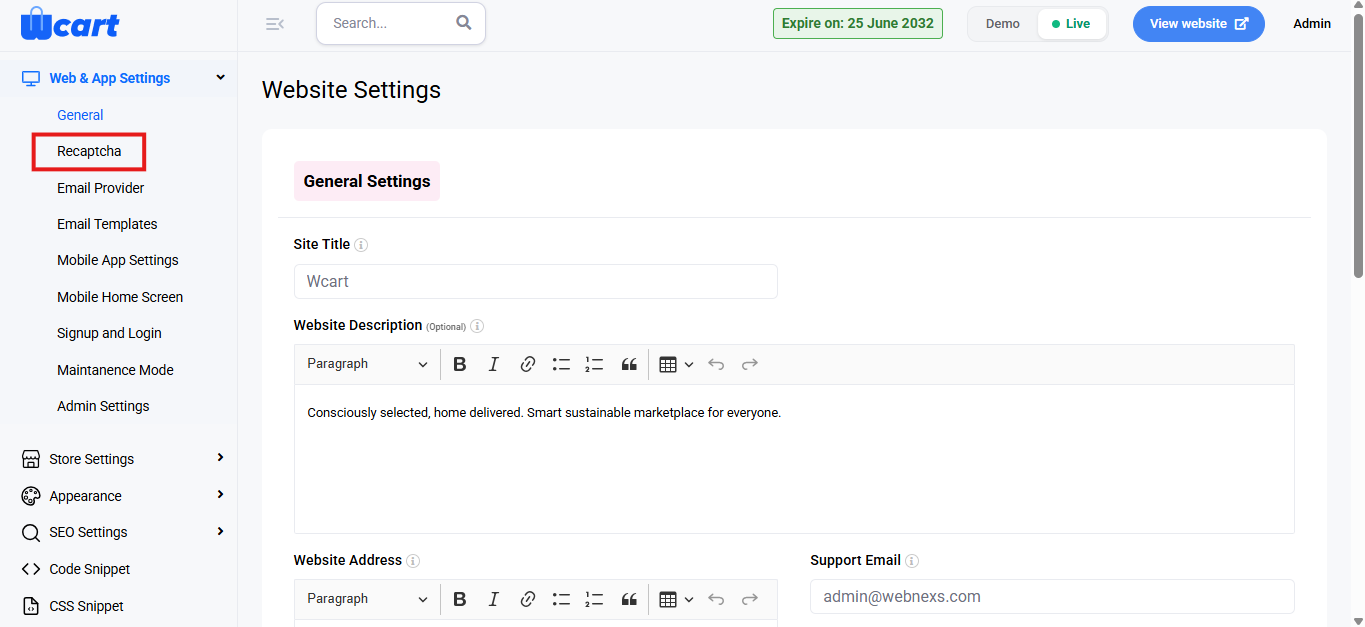
The reCAPTCHA Settings section allows you to add and manage your Google reCAPTCHA keys for the store. This configuration must be completed before enabling the reCAPTCHA Integration on forms.
To configure, follow these steps:
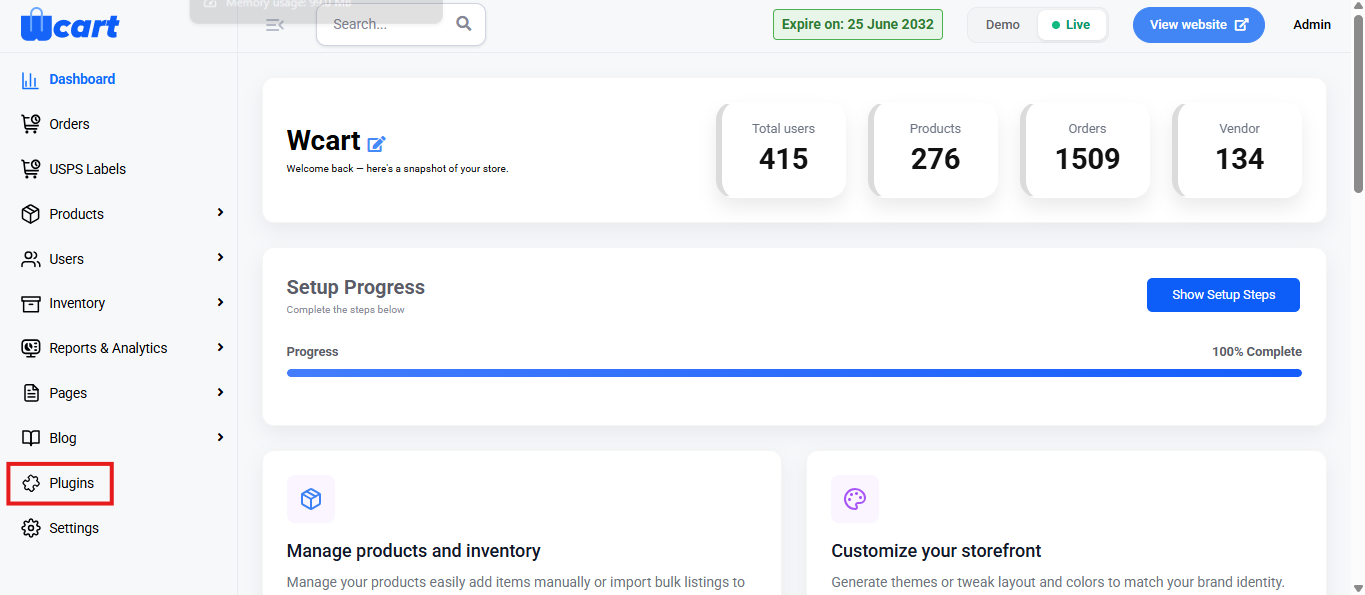
Navigate to the sidebar menu and click ‘Plugins’.
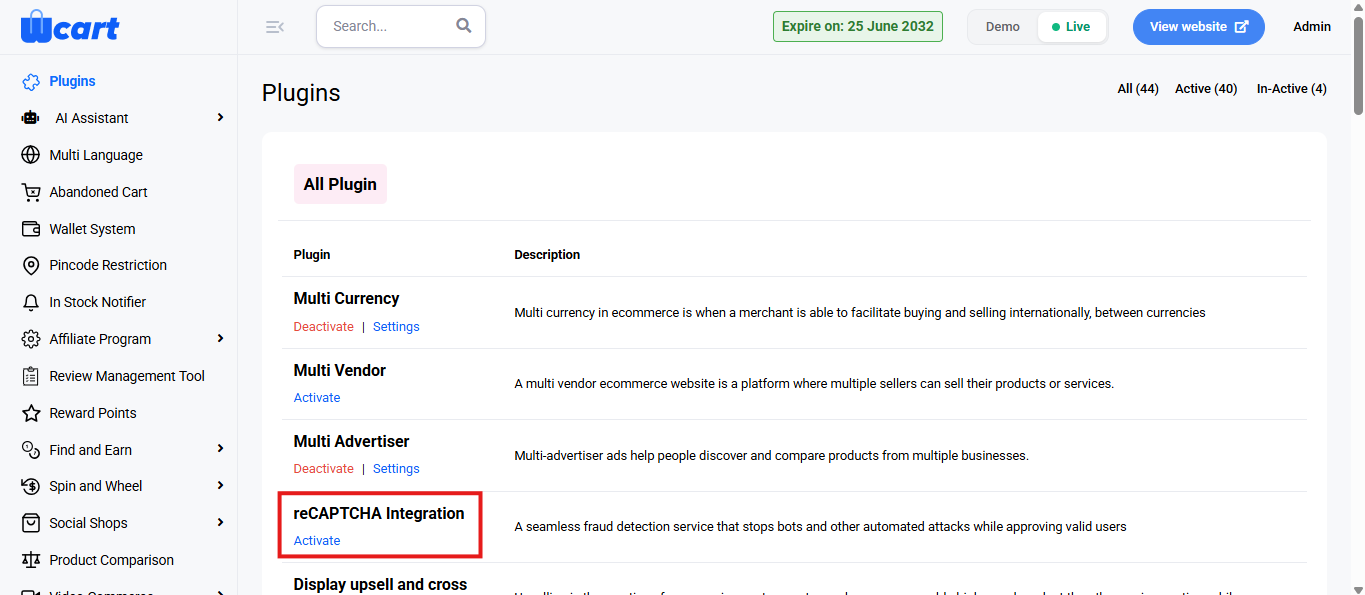
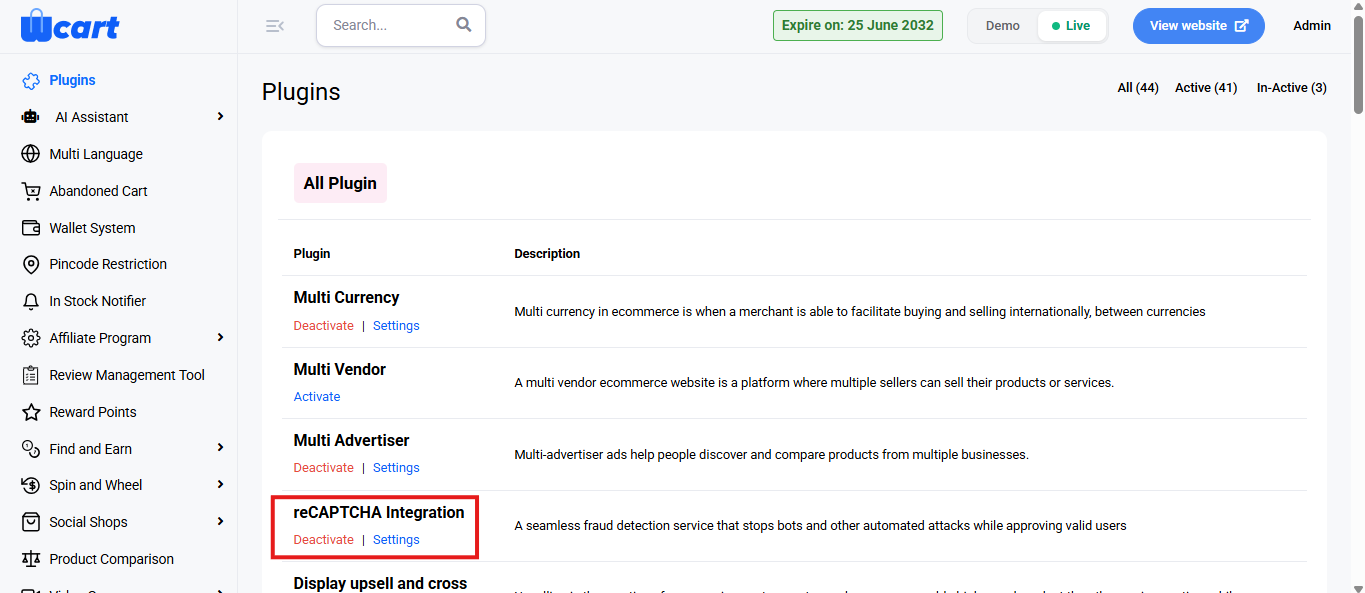
Locate ‘reCAPTCHA Integration’ and click ‘Activate’. You will now see two options: ‘Deactivate’ and ‘Settings’. When you click ‘Activate’ or ‘Deactivate’, a toast notification showing ‘reCAPTCHA Integration Plugin Activated’ or ‘reCAPTCHA Integration Plugin Deactivated’ will appear to confirm that the plugin has been activated or deactivated. You can configure reCAPTCHA by clicking ‘Settings’ or by selecting ‘reCAPTCHA’ from the left sidebar menu after activation.
Fields for reCAPTCHA Settings:
Label: Enter a name to identify this key set.
Site Key: Paste the site key obtained from your Google reCAPTCHA admin console.
Secret Key: Paste the corresponding secret key from Google reCAPTCHA.
reCAPTCHA type options:
Score based (v3): Verifies requests in the background using a score.
“I’m not a robot” Checkbox (v2): Shows a visible checkbox for user verification.
Invisible reCAPTCHA badge (v2): Validates requests in the background with a badge.
Using Sample Key:
Next to each reCAPTCHA type, click “Sample Key” to auto-fill example Site Key and Secret Key values for testing.
The sample keys appear below the selected type in the Site Key and Secret Key fields for that mode.
Use these sample keys only for testing in non‑production environments.
After entering your own keys or using sample keys for testing, click Complete to save the configuration. A toast notification ‘Updated reCAPTCHA Settings’ will appear to confirm the update.
Adding Integration
This reCAPTCHA Integration section allows you to choose where the configured reCAPTCHA should be applied across your store.
Click ‘+ Integrations’ in the top-right corner of the page to configure settings.
Forms in reCAPTCHA Integration Settings:
Admin Signin: Enable to show reCAPTCHA on the admin login page.
User Registration: Enable to protect the customer registration form.
User Login: Enable to display reCAPTCHA on the customer login form.
Vendor Registration: Enable to secure the vendor signup form.
Vendor Login: Enable to add reCAPTCHA to the vendor login form.
Order Page: Enable to validate customers on the checkout or order submission page.
Click ‘Submit’ to apply the changes. After saving, reCAPTCHA will be active on all selected forms in your storefront. A toast notification ‘Updated reCAPTCHA Form Settings’ will appear to confirm the update.
The reCAPTCHA integration enhances security by preventing spam and bot submissions on your store’s forms, ensuring a safer experience for both admins and users.