
This section enables efficient management of events within the ‘Find and Earn’ program by adding, editing and organizing event details. It ensures smooth tracking and customization of events to enhance user engagement and experience.
To configure, follow these steps:
- Navigate to the sidebar menu, click ‘Plugins’.
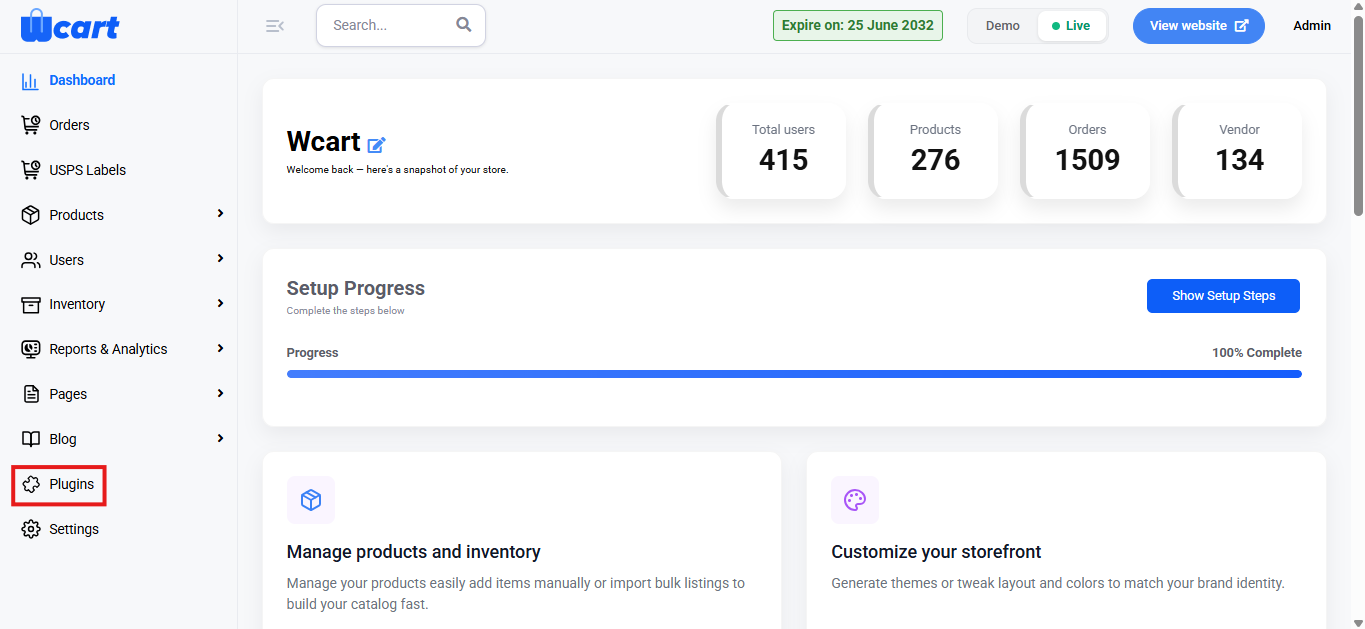
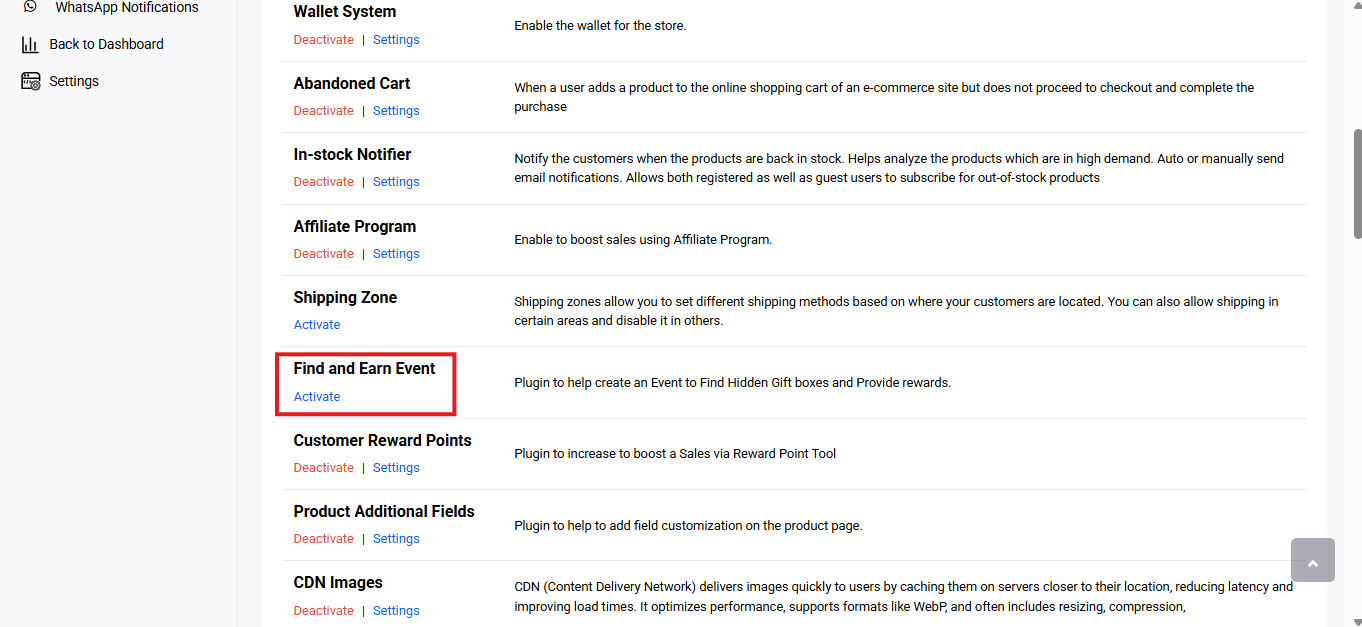
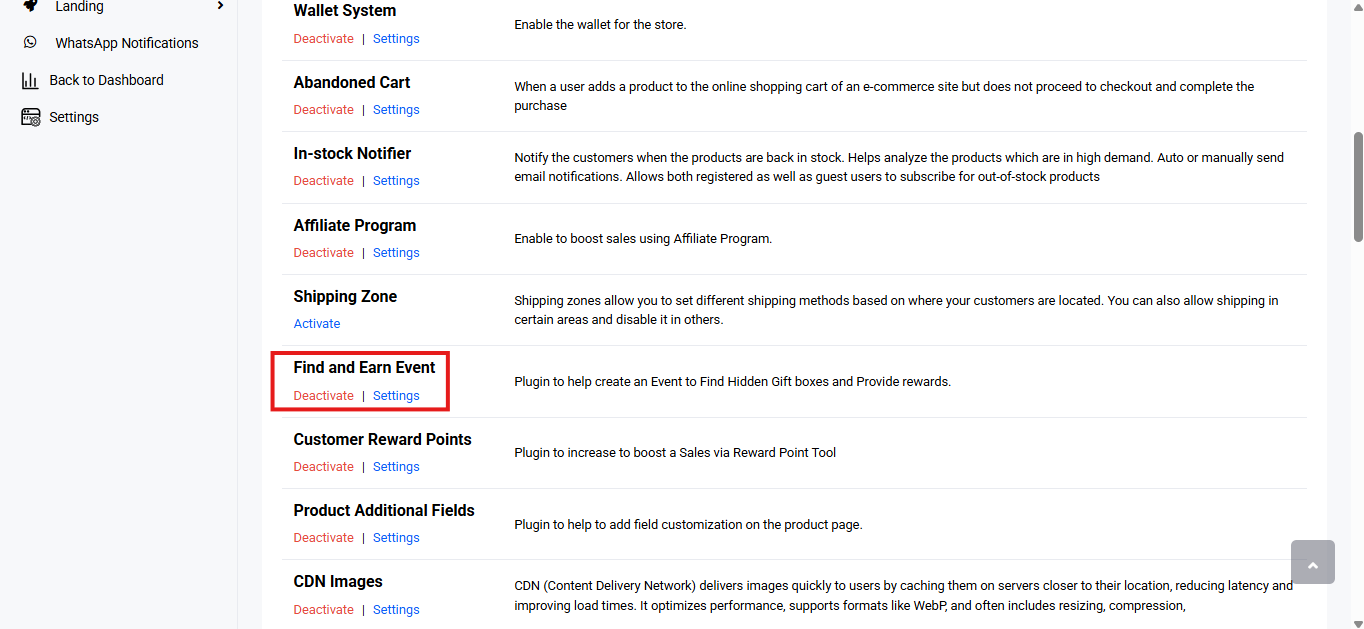
- Locate ‘Find and Earn’ and click ‘Activate’. You will now see two options: ‘Deactivate’ and ‘Settings’. When you click ‘Activate’ or ‘Deactivate’, a toast notification showing ‘Find and Earn Event Plugin Activated’ or ‘Find and Earn Event Plugin Deactivated’ will appear to confirm that the plugin has been activated or deactivated. You can configure ‘Find and Earn’ by clicking ‘Settings’ or by selecting ‘Spin Wheel’ from the left sidebar menu after activation.
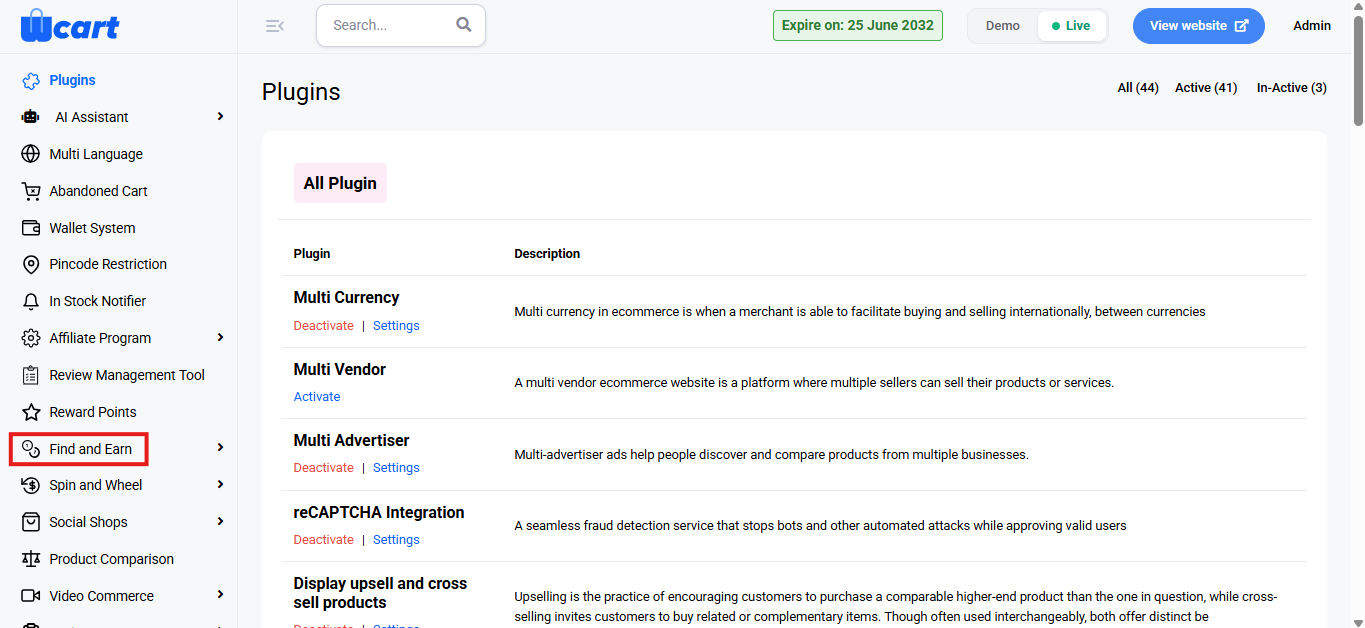
You will find the options mentioned below on the page to add and manage ‘Events’.
Adding Events
- Click on the ‘+ Add Event’ button at the top-right corner to add new tags.
- Title: Enter the name of the event. This is a mandatory field. If left empty, an alert message will appear saying ‘Please provide Title’.
- Status: Allows you to toggle the event’s visibility by selecting one of the following options from the dropdown:
- Enable: Activates the event, making it visible and accessible to users.
- Disable: Deactivates the event, making it unavailable for users.
- Start Date: Select the start date of the event using the date picker. This is a required field.
- End Date: Select the end date of the event using the date picker. This is a required field.
- Coupon Code: Enter a unique coupon code for the event. This is a required field.
- Coupon Value: Specify the value of the coupon. This is an optional field.
- Coupon Limit: Set the limit for the number of times the coupon can be used. This is an optional field.
- Number of Items: Enter the number of items associated with the event. This is an optional field.
- Description (Optional): Provide a description for the event. This is an optional field where you can add additional information about the event.
- Save & Continue: Click this button to save the event details. A toast notification ‘Event Added Successfully’ will appear to confirm the addition.
Now return to the all events section. You will find a table with various columns to interpret events data quickly and accurately. The columns are listed below:
- S.No: Displays the serial number of each event.
- Title: Displays the title of the event.
- Status: Allows you to toggle the event’s visibility by selecting one of the following options:
- Active: Activates the event, making it visible and accessible to users.
- Inactive: Deactivates the event, making it unavailable for users.
- Action: Manage the event with the following options:
- Edit: Click the ‘Edit’ icon to modify the event details.
- The same form fields from ‘Add Event’ will be available. After making changes, click the button to update the event. A toast notification ‘Event Updated Successfully’ will appear to confirm the update.
- Additionally, there are two other navigation tabs to configure: ‘Gift Items’ and ‘Custom Messages’.
- You will find the options mentioned below on the page to add and manage ‘Events’.
- Adding Event Items
- Click on the ‘+ Add Item’ button to add a new event item.
- Display Content: Click ‘Choose File’ to upload the content that will be displayed for the event item. This is a mandatory field.
- Open Display Content: Click ‘Choose File’ to upload additional content that will be opened for this event item. This is optional.
- Element Type: Select the type of element for the event item. Available options include:
- Category Page
- Product Page
- Placement Type: Specify the placement of the event item.
- Placement Position: Choose where the event item will be placed on the page:
- Enable Coupon: Select whether the coupon will be enabled for this event item:
- Enable: Activates the coupon for this event item.
- Disable: Deactivates the coupon for this event item.
- Coupon Settings: These options are only available after enabling the coupon:
- Coupon Code: Enter a unique code for the event coupon. This is a required field.
- Coupon Value: Specify the value of the coupon. This field is optional and can be left empty if no value is assigned.
- Coupon Limit: Set the limit for how many times the coupon can be used. This is an optional field. If not specified, there will be no usage limit for the coupon.
- Hint for Next Gift: Enter a hint for the next gift that users will be able to find. This field is optional.
- Description (Optional): Provide additional information about the event item. This is optional.
- Add: Click this button to save the event item. A toast notification ‘Item Added Successfully’ will appear to confirm the addition.
- Cancel: Click to discard the changes.
- You will find a table with various columns to interpret all gift items data quickly and accurately. The columns are listed below:
- S.No: Serial number of the row in the current view.
- Display Content: Displays images related to the event, indicating what content will be shown.
- Element Type: Specifies the page type where the event will be placed, such as “Category Page” or “Product Page”.
- Placement View: Provides an icon to indicate where the event will be visible (e.g., product or category page).
- Coupon Status: Displays whether the event is associated with a coupon (“Yes” or “No”).
- Action: Provides icons for quick actions related to each event. The following icons are available under this column:
- Edit: The same form fields available in ‘Add Event’ are also present here for configuration.
- Delete: Deletes the category. A dialog box ‘Remove Event’ will appear with the text ‘Are you sure you want to delete this Event Item ?’ along with ‘Close’ and ‘Delete’ options. Closing will remove the dialog box and clicking on ‘Delete’ will display this toast notification ‘Event Item Deleted Successfully’ to confirm deletion.
- Custom Messages: The same fields available in the ‘Settings’ tab are also available here for configuration. The only new addition is the button ‘Click here to enable Custom Email Messages for the Event items.’ Enabling this will send the messages to the users.
- Preview: View detailed submissions for a specific user.
- S.No: Displays the serial number of each submission.
- User Name: Shows the name of the user who participated in the event.
- Email ID: Displays the user’s email address.
- Items Found: Shows the number of items the user has found for the event.
- Won Complete: Indicates whether the user has completed the event and won any prizes, with two options:
- Yes: The user has completed the event and won a prize.
- No: The user has not completed the event or has not won a prize.
- Action: indicates whether the user has won a gift for the event item, with two options:
- S.No: Displays the serial number of the event item.
- Event Item ID: Displays the unique ID for each event item.
- Gift Win: Indicates whether the user has completed the event and won any prizes, with two options:
- Delete:
- Delete: Deletes the category. A dialog box ‘Remove Event’ will appear with the text ‘Are you sure you want to delete this Event?’ along with ‘Close’ and ‘Delete’ options. Closing will remove the dialog box and clicking on ‘Delete’ will display this toast notification ‘Event Deleted Successfully’ to confirm deletion.
- Edit: Click the ‘Edit’ icon to modify the event details.
This efficiently manages events, boosting user engagement with easy customization and updates. It enables smooth event configuration, coupon management and custom messaging.