
Global Font Settings
This section allows you to customize the fonts for various sections of your website, such as the body, headings, paragraphs and buttons.
To configure, follow these steps:
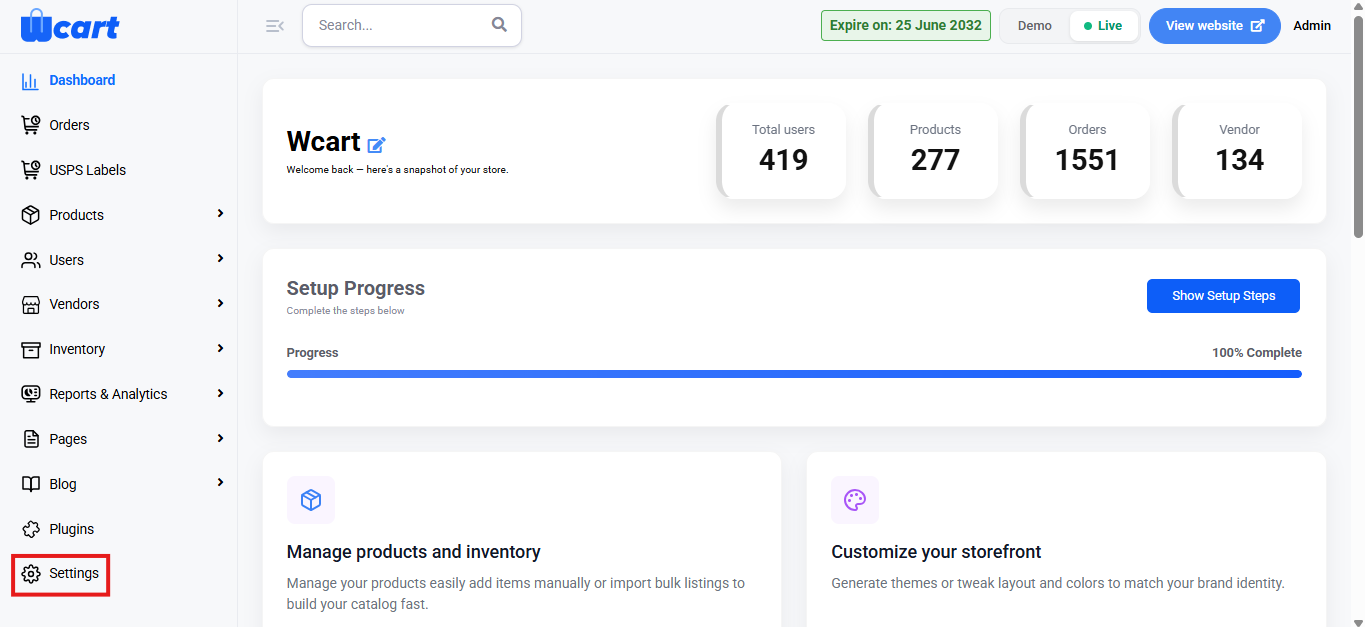
- Navigate to the sidebar menu, click ‘Settings’.
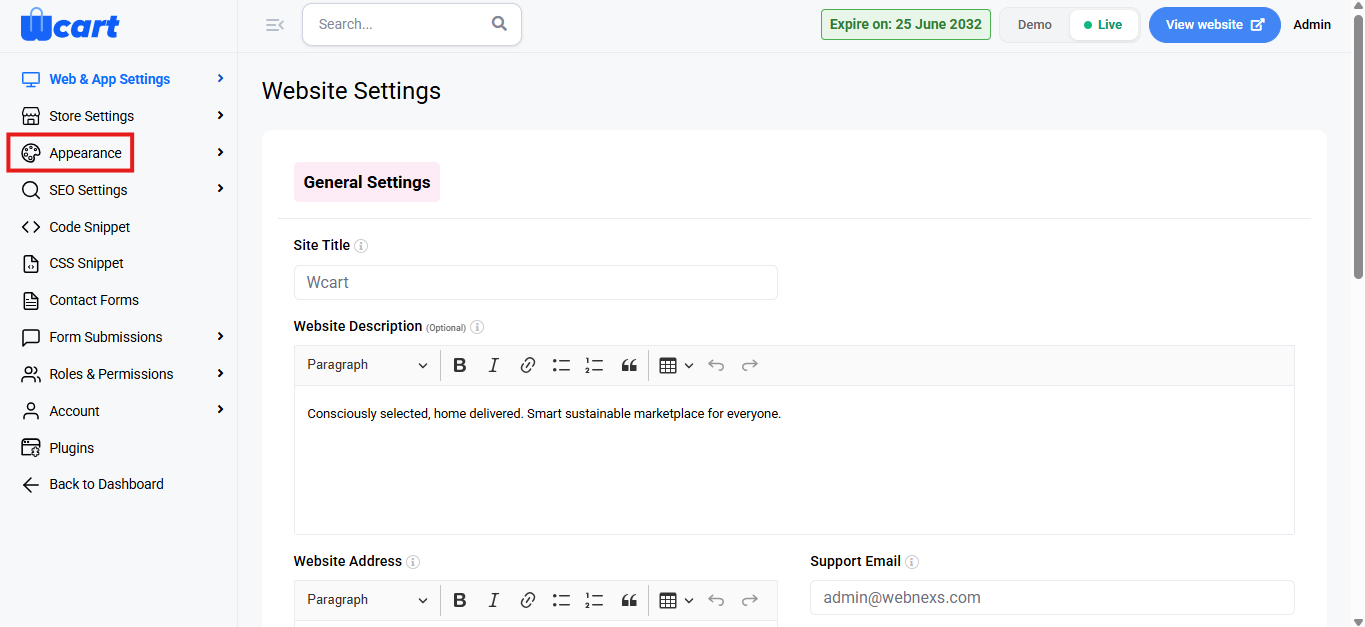
- Select ‘Appearance’.
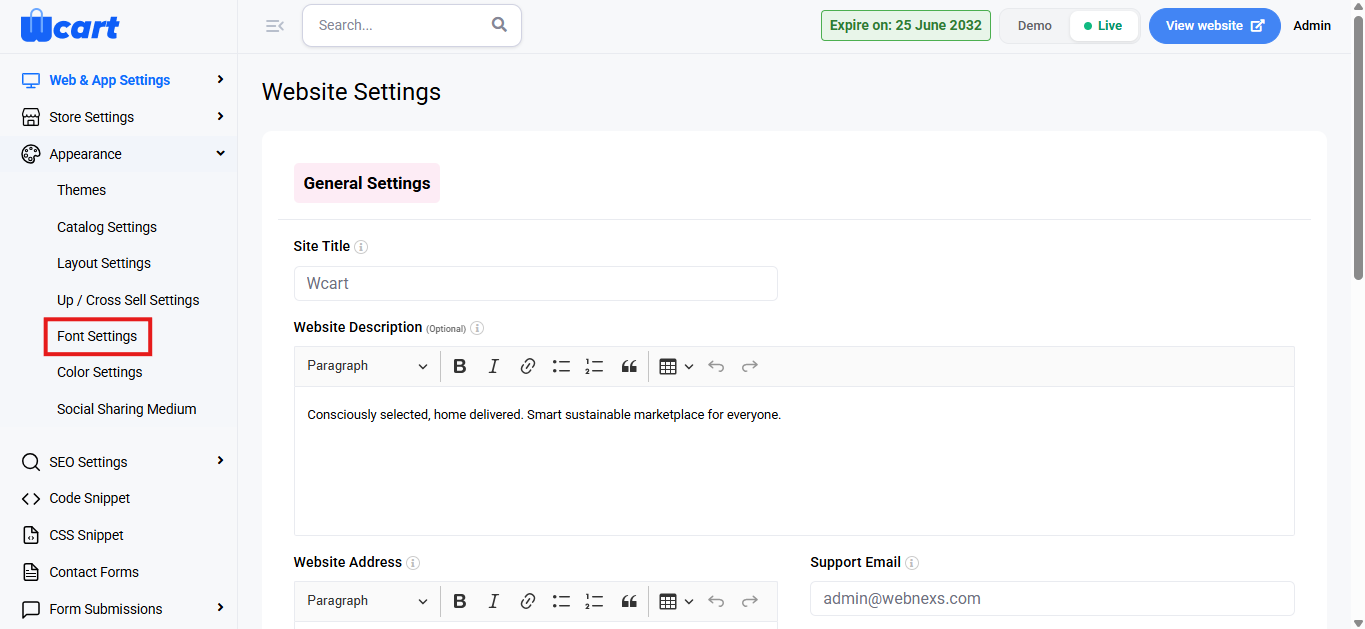
- Next, choose ‘Font Settings’.
You will see fields for the following font types:
- Body Font
- H1 Font
- H2 Font
- H3 Font
- H4 Font
- H5 Font
- H6 Font
- Paragraph Font
- Link Font
- Button Font
- Select Fonts for Each Section: For each font type, click the dropdown next to the respective field to choose the desired font from the available list. The dropdown list that appears are the ones that are configured by clicking ‘Website Fonts’at the top-right corner of the page.
- Submit: Click this button at the bottom to save your settings. A toast notification ‘Global Font Settings Updated Successfully’ will appear to confirm the update.
Add a New Font:
Click the ‘Google Font’ button in the top-right corner of the page.
A pop-up window will appear with the form fields mentioned below:
- Font Name: Enter a name for the Google font.
- Font Family: Enter the font family name.
- Google Link: Provide the URL of the Google font. This is the link you get when selecting a Google font from Google Fonts.
- Submit: Click this button to save the font. A toast notification ‘Google font added successfully’ will appear to confirm the addition.
- Close: Click this button to cancel.
Add a Custom Font:
Font Details:
- Font Name: Enter a unique name for the custom font.
- Font Family: Enter the font family.
- Font Style: Choose between Normal or Italic for the font’s style.
- Font Weight: Specify the font weight.
- Font Display: Choose Block or other display settings.
Upload Font Files:
- Upload woff2: Click to upload the woff2 font file.
- Upload woff: Click to upload the woff font file.
- Upload svg: Click to upload the SVG font file.
- Upload eot: Click to upload the eot font file.
- Submit: Click this button to save the custom font. A toast notification ‘Custom font added successfully’ will appear to confirm the addition.
- Close: Click this button to exit without saving.
View Existing Fonts:
You will see a list of fonts with the following information:
- Font Name: The name of the font.
- Font Family: The font family.
- Delete: Removes the font. A dialog box will appear with the text ‘Are you sure you wish to delete this font?’ along with ‘Ok’ and ‘Cancel’ options. Cancelling will remove the dialog box and clicking on ‘Ok’ will display this toast notification ‘Font Deleted Successfully’ to confirm deletion.
These settings allow you to easily change and customize the fonts on your website, giving it a unique and consistent look.