
This section allows administrators to create, view, update, and delete user roles within the system. Roles define what actions staff members can perform by assigning specific permissions.
To configure, follow these steps:
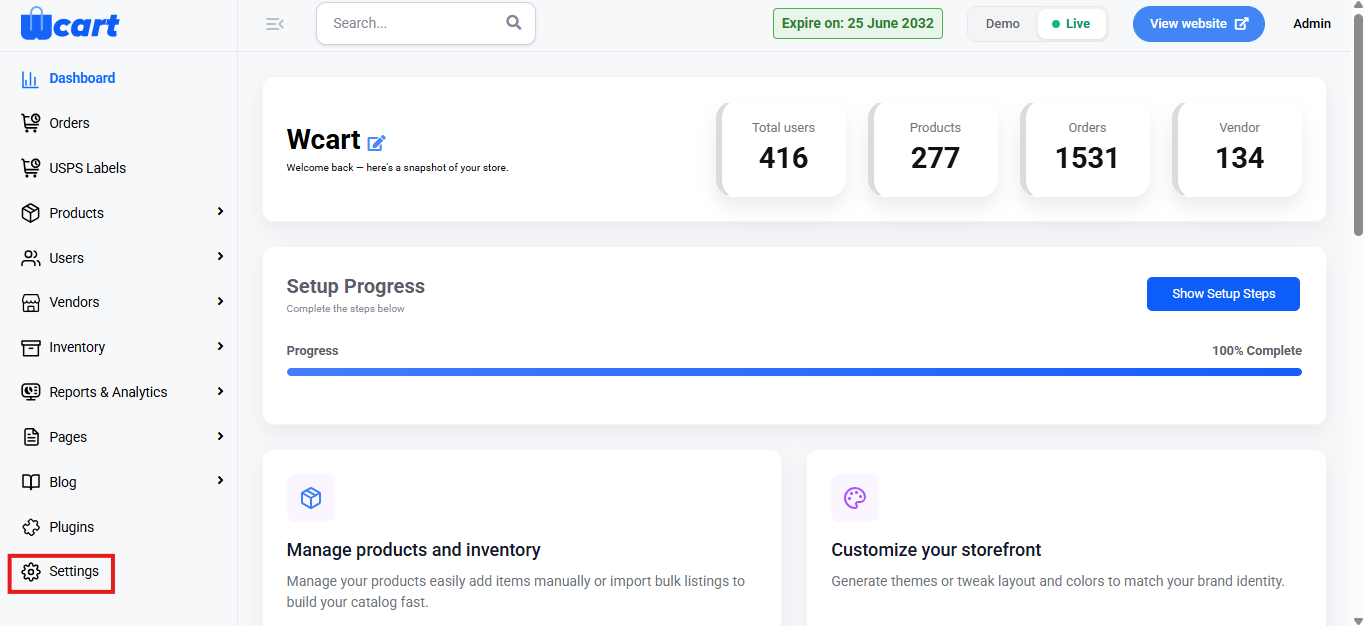
- Navigate to the sidebar menu, click ‘Settings’.
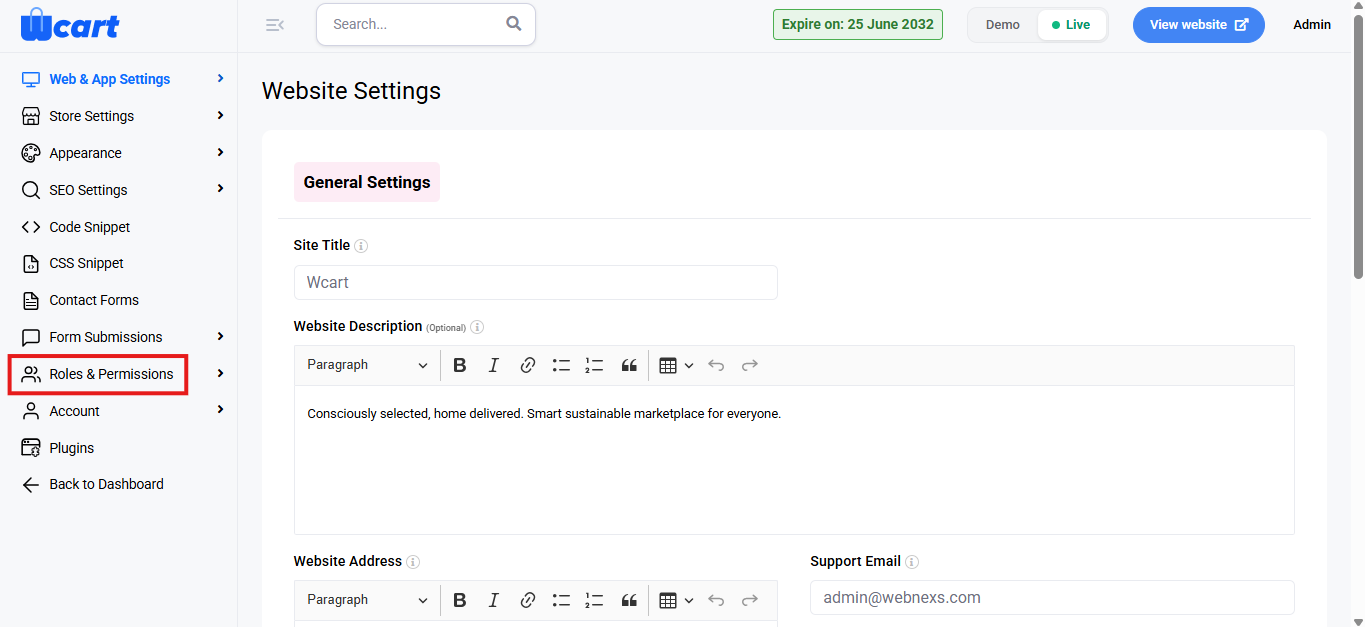
- Select ‘Roles & Permissions’.
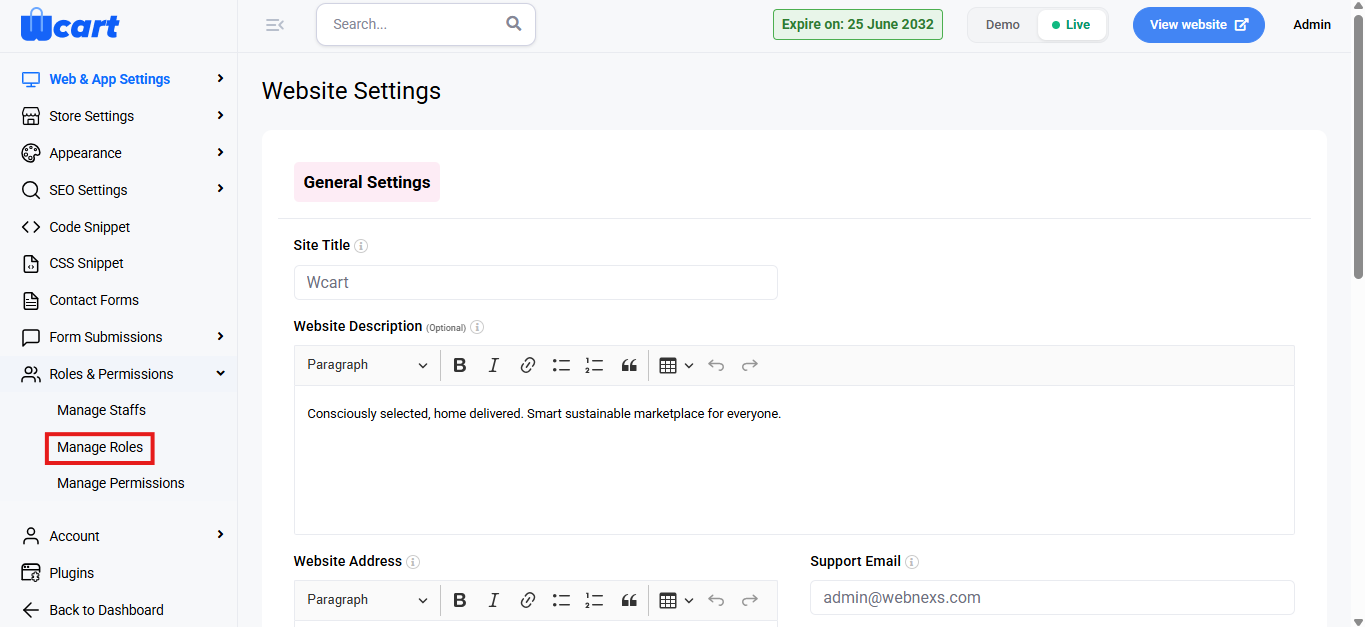
- Next, choose ‘Manage Roles’.
Add New Role
Click the ‘+’ Add New Role button in the top-right corner of the ‘Manage Roles’ page. A pop-up window will appear asking for the following details:
- Role Name: Enter a unique and descriptive name for the role.
- Submit: Saves the role and allows permission configuration. A toast notification ‘New Role added successfully’ will appear to confirm the addition.
- Cancel: Closes the pop-up without saving.
View Roles List
This page displays a list of all roles with the following details:
- S.No: Serial number of the role entry.
- Role Name: Name assigned to the role.
- Action: Options to edit or delete the role.
- Edit: Define and manage access permissions for a specific role. The column headers are mentioned below:
- S.No: Displays the serial number of each permission item.
- Permission: Indicates the module or feature for which access can be granted. The list of permissions is mentioned below. This list can also be found in Manage Permissions submenu within Roles & Permissions in the left sidebar menu.
- Manage Products
- Manage Categories
- Manage Tags
- Manage Brands
- Manage Attributes
- Manage Orders
- Manage Users
- Manage Vendors
- Manage Commission
- Vendor Earnings
- Vendor Payouts
- Manage Pages
- Manage Blogs
- General Settings
- Email Settings
- Payment Settings
- Login API Settings
- Login Screens
- Theme Settings
- Global Color Settings
- Home Banners
- SEO Settings
- General Page SEO
- Social Links
- XML Sitemap
- Manage Staffs
- Manage Roles
- Manage Permissions
- Form Submissions
- Website Fonts
- Font Settings
- Email Templates
- Inventory Settings
- Manage Territory
- Manage Warehouse
- Manage Store Location
- Manage Warehouse Products
- Manage Store Products
- Social Sharing Medium
- Reports Overview
- Manage Coupons
- Manage Currency
- Manage Language
- Manage Tax
- Manage Return Settings
- Manage Vendor Form Field
- Abandoned Cart
- Subscription Details
- Shipping Settings
- Store Address
- Menu Settings
- Manage Translations
- Plan Based Restriction
- Pincode Restriction
- Localization
- All (Checkbox): Tick to grant full access to the selected module (View, Create, Edit, and Delete).
- View (Checkbox): Tick to allow viewing the module data.
- Create (Checkbox): Tick to allow adding new records.
- Edit (Checkbox): Tick to allow modifying existing records.
- Delete (Checkbox): Tick to allow deleting records.
- Using Role Permissions
- In the permissions table, each row represents a system feature.
- Select access using the columns:
- All
- View
- Create
- Edit
- Delete
- Choose All for complete control or select individual actions as needed.
- Save the role to apply permissions to assigned staff. A toast notification ‘Role Setting Updated Successfully’ will appear to confirm the update. Click ‘Cancel’ to discard the changes.
- Delete: Removes the selected role. A dialog box will appear with the text ‘Are you sure you wish to delete this role?’ along with ‘Ok’ and ‘Cancel’ options. Cancelling will remove the dialog box and clicking on ‘Ok’ will display this toast notification ‘Role Data Removed Successfully’ to confirm deletion.